What have you done to your square lately??

Disclaimer: Links on this page pointing to Amazon, eBay and other sites may include affiliate code. If you click them and make a purchase, we may earn a small commission.

Jrgunn5150

Questionable methods
Joined
Jan 11, 2016
Posts
3,148
Reaction score
2,718
Location
Ionia Mi
First Name
J.R.
Truck Year
1979
Truck Model
C10
Engine Size
6.slow
Did you remove the bypass valve doohickey under the filter stud?

You must be registered for see images attach
No. You can if you want to, but it'll just stay in bypass if you don't because item basically sees the cooler as plugged now.
Nice! Can you print a spread bore carb spacer?
I'm sure I could once I get it worked out, somehow I misjudged the hole sizes or spacing on this iteration and they bound up on the carb.
 

gilby959798

Full Access Member
Joined
Sep 12, 2022
Posts
411
Reaction score
2,163
Location
CLT NC
First Name
John
Truck Year
1977
Truck Model
GMC K25 Camper Special
Engine Size
350
Oil cooler delete on the 454.

Also test fit a carb spacer I printed

You must be registered for see images attach

You must be registered for see images attach
What filament are you planning to use, or is it just for mock up?
 

legopnuematic

Licensed Junk Dealer
Supporting Member
Joined
Oct 27, 2016
Posts
5,266
Reaction score
19,865
Location
MO
First Name
Spencer
Truck Year
1971, 1̶9̶7̶4, 1976, 1979,1̶9̶8̶5, 2002
Truck Model
Dart Swinger, Sierra 10, C10 Cheyenne, C10 Big Ten, Silverado 10, Ram 2500
Engine Size
225/6, 350 c.i., 350 c.i., 5.9l Cummins
Last night's work, boring out the stud holes in the rotors and hubs to accept some 1/2-20 studs instead of the original 7/16 studs.

If my DRO on the mill was trustworthy, I would have just swept the center bore in, one hole, done the trig to determine my start angle, and go hole to hole by trig. The DRO however likes to reset itself so I decided to just indicate each bore and bore it, then repeat for each hole. Not the fastest way but worked fine.
You must be registered for see images attach

Going to .615 for the new studs.
You must be registered for see images attach

And onto the hubs.
You must be registered for see images attach

Have to finish the other hub and then they will be ready to reassemble and hopefully have the 10 bolt done by the end of the week.
You must be registered for see images attach

 

Jrgunn5150

Questionable methods
Joined
Jan 11, 2016
Posts
3,148
Reaction score
2,718
Location
Ionia Mi
First Name
J.R.
Truck Year
1979
Truck Model
C10
Engine Size
6.slow
Yep makes senses, gotta love quick prototyping.
The ability to quickly iterate without real cost or even time consequences is the biggest benefit to printers.

When we got one at work, my director had to retrain his brain lol, what if it doesn't fit, what if it breaks? Throw it away and print another man, it's 12 cents. We used to pay hundreds of dollars for SLA's and thousands for laser cut parts, just to have something to develop fixturing for assembly and painting.

Now we just poop the parts out, poop the nest, fixturing, all of it out until we have what we want, right in our metrology lab.
 

Jrgunn5150

Questionable methods
Joined
Jan 11, 2016
Posts
3,148
Reaction score
2,718
Location
Ionia Mi
First Name
J.R.
Truck Year
1979
Truck Model
C10
Engine Size
6.slow
Just curious but what infill pattern would you employ in a "working" model?
Depends wildly, on if it matters, what the print orientation is, etc etc. When I print 2A stuff, for instance, it's all walls. If I needed strength from all directions, gyroid. For this, where it's basically just sitting there, rectilinear.

Walls add a ton of strength, people tend to not thing of that, but this will be 6 walls/layers.
 

gilby959798

Full Access Member
Joined
Sep 12, 2022
Posts
411
Reaction score
2,163
Location
CLT NC
First Name
John
Truck Year
1977
Truck Model
GMC K25 Camper Special
Engine Size
350
The ability to quickly iterate without real cost or even time consequences is the biggest benefit to printers.

When we got one at work, my director had to retrain his brain lol, what if it doesn't fit, what if it breaks? Throw it away and print another man, it's 12 cents. We used to pay hundreds of dollars for SLA's and thousands for laser cut parts, just to have something to develop fixturing for assembly and painting.

Now we just poop the parts out, poop the nest, fixturing, all of it out until we have what we want, right in our metrology lab.
Yep, its cheap to print, people just don't value the time it takes to design stuff like that though. I haven't done PA6 yet, but I will need to add it to my list. I have done a lot in ASA and PETG though. plenty of functional parts running around on various vehicles.
 

bucket

Super Moderator
Staff member
Moderator
Joined
Aug 3, 2010
Posts
35,319
Reaction score
44,381
Location
Usually not in Ohio
First Name
Andy
Truck Year
'77, '78, '79, '84, '88
Truck Model
K5 thru K30
Engine Size
350-454
You would have done much better if you moved the trailer coupler up higher and just put a ball on the bumper. Or, turn the hitch adapter around, you added a big lever.

Yeah, I know. But the ball height was already too high.

It wasn't planned out at all. Just one of those "hey, I need to do this real quick, it should be fine" type of situations.
 

73 cheySuper

Full Access Member
Joined
Sep 16, 2025
Posts
55
Reaction score
191
Location
beaverton
First Name
jerry
Truck Year
1973
Truck Model
cheyenne super C20
Engine Size
454
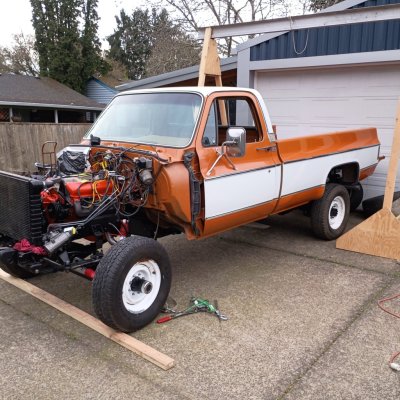
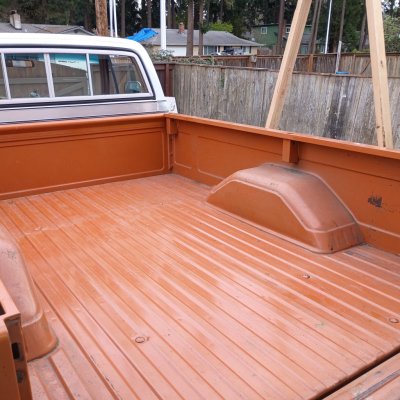
FINALLY, set the body and bed on the waiting chassis. Overlooked the '77 frame not being drilled for the 2nd line of bed bolt holes. So had to go in reverse for a bit. So far, I'm liking it. Fired up the fresh 468 monday and broke in the cam. That went very well except I had to bend the flexplate back into spec. I used a standard turbo 400 converter on the '89 version 400, and it didn't slip on the trans pump, so after bolting up the trans, I had shifted the starter ring gear roughly 3/16" forward where the starter wouldn't release. Destroyed the factory starter, then attempted to eat a powermaster before I caught the issue.
 

Attachments

  • 1000000783.jpg
    1000000783.jpg
    265.9 KB · Views: 31
  • IMG_20260318_175213080.jpg
    IMG_20260318_175213080.jpg
    218.1 KB · Views: 28
Last edited:

Bloodhound1981

Full Access Member
Law Enforcement
Joined
Nov 15, 2016
Posts
370
Reaction score
883
Location
MA
First Name
Rusty
Truck Year
1981
Truck Model
C-10
Engine Size
5.7
Now that the snow is gone, I brought her out of hibernation and finally installed the Tonno Pro cover I've had laying in the bed since Christmas. I'm very impressed with the quality, especially for just $300.

You must be registered for see images attach

 

Latest posts

Forum statistics

Threads
48,576
Posts
1,071,625
Members
43,129
Latest member
Cletus-33
Top