Rusted exhaust studs

Disclaimer: Links on this page pointing to Amazon, eBay and other sites may include affiliate code. If you click them and make a purchase, we may earn a small commission.

MadOgre

Full Access Member
Joined
May 4, 2014
Posts
4,090
Reaction score
49
Location
NA
First Name
NA
Truck Year
NA
Truck Model
NA
Engine Size
NA
Check out heartthrob's exhaust website. They seem to have the best list of affordable systems. But I still pieced together my own Y-pipe back system using parts from Summit, eBay and Rock Auto for about $200. It is still single exit though. At some point I want to split it at the axle and have duals out under the back bumper.

When I replaced the heads on my '89 I got my balls busted here about using those manifold to head gaskets. Quite a few here said you don't need them at all. From what I can tell on my '90 it does not have them either.

Hey thanks for the tip! Turns out they have suppliers in Canada too.

Don't know how much they want though
 

DoubleDingo

Full Access Member
Joined
Jul 3, 2012
Posts
10,243
Reaction score
14,609
Location
Right where I am
First Name
Bagoomba
Truck Year
1981
Truck Model
81-C20 Silverado Camper Special-TH400-4.10s
Engine Size
Carb'ed Vortec 350
Definitely haven't seen that setup.
 

MadOgre

Full Access Member
Joined
May 4, 2014
Posts
4,090
Reaction score
49
Location
NA
First Name
NA
Truck Year
NA
Truck Model
NA
Engine Size
NA
those are the proper method. how ever I have from time to time just used regular grade 5 bolts to do the job.
 

Irishman999

Full Access Member
Joined
Jul 30, 2010
Posts
6,989
Reaction score
202
Location
Safford Arizona
First Name
Jason
Truck Year
1985
Truck Model
K-1500 High Sierra
Engine Size
305
I went through this twice with my 85 K1500 and once with the 90 454SS.

The factory studs are soft so just punch a hole in the center of the broken stud and drill it out. Whatever you do dont even attempt an easy out because once you break on off in the hold its 10 times harder to drill out.

I drill them out all the way and instal heli coils into the manifold. I dont know about Canada but here you can find a kit with the studs you need and some big ass brass nuts. Both trucks I did this to had springs to begin with but I left them out and used big brass nuts.

I did this twice to the 85 because the first repair I used the kit with springs and a regular steel nut. After only 2 years of driving it in ARIZONA the nuts did not want to come off, studs snapped off where they usually do and I was back to square one with the exception of drilling through harder studs stuck in the manifold. Brass nuts just come off or shear the threads without damaging the studs. I actually red locktite the studs into the manifolds now since I cant **** them up with brass nuts so there really is no reason to remove them again.
 

MadOgre

Full Access Member
Joined
May 4, 2014
Posts
4,090
Reaction score
49
Location
NA
First Name
NA
Truck Year
NA
Truck Model
NA
Engine Size
NA
Yes Canada has lots of studs LOL

The brass nuts are the way to go!
 

89Suburban

Supporting Member
Supporting Member
Joined
Dec 7, 2010
Posts
24,541
Reaction score
5,847
Location
Southeast PA
First Name
Paw Paw
Truck Year
2007
Truck Model
Chevrolet Tahoe LT
Engine Size
5.3, 4WD
Good point on the brass nuts. That was actually a factory item on the 70 - 80's Dodge trucks. But they did not use the springs like GM did.
 

DoubleDingo

Full Access Member
Joined
Jul 3, 2012
Posts
10,243
Reaction score
14,609
Location
Right where I am
First Name
Bagoomba
Truck Year
1981
Truck Model
81-C20 Silverado Camper Special-TH400-4.10s
Engine Size
Carb'ed Vortec 350
At Carquest where I got my 2 sets of studs, lock washers and nuts, the nuts are the long brass ones. I have been using those since the early 90's. They are far superior to the steel nuts that freeze on the studs. The brass ones will scream and squeal when removing them after a few years, but they don't seem to freeze onto the studs.

How difficult is it to put in helicoil? The one stud that gave me fits caused my tap to wander and now the stud wobbles a little in the threaded hole. There was a small piece of it that didn't drill out completely, so when I was tapping the threads, the tap would bind because the remnant of the stud was actually turning and coming out the other side. I am tempted to just run it like that because it's not a lot of wobble, but don't want to do a half-assed job, so am leaning towards helicoil on that stud so it will be tight like the rest of them.

Do you just drill the hole bigger, tap it for the outside diameter of the helicoil, thread in the helicoil and you're good to go?
 

Irishman999

Full Access Member
Joined
Jul 30, 2010
Posts
6,989
Reaction score
202
Location
Safford Arizona
First Name
Jason
Truck Year
1985
Truck Model
K-1500 High Sierra
Engine Size
305
At Carquest where I got my 2 sets of studs, lock washers and nuts, the nuts are the long brass ones. I have been using those since the early 90's. They are far superior to the steel nuts that freeze on the studs. The brass ones will scream and squeal when removing them after a few years, but they don't seem to freeze onto the studs.

How difficult is it to put in helicoil? The one stud that gave me fits caused my tap to wander and now the stud wobbles a little in the threaded hole. There was a small piece of it that didn't drill out completely, so when I was tapping the threads, the tap would bind because the remnant of the stud was actually turning and coming out the other side. I am tempted to just run it like that because it's not a lot of wobble, but don't want to do a half-assed job, so am leaning towards helicoil on that stud so it will be tight like the rest of them.

Do you just drill the hole bigger, tap it for the outside diameter of the helicoil, thread in the helicoil and you're good to go?

They are not hard at all to install, I think the threads are 3/8's and the heli-coil kit tells you what drill bit size to buy. Drill that hole out and run a tap in, install heli coil and your good to go for all eternity.
 

DoubleDingo

Full Access Member
Joined
Jul 3, 2012
Posts
10,243
Reaction score
14,609
Location
Right where I am
First Name
Bagoomba
Truck Year
1981
Truck Model
81-C20 Silverado Camper Special-TH400-4.10s
Engine Size
Carb'ed Vortec 350
They are not hard at all to install, I think the threads are 3/8's and the heli-coil kit tells you what drill bit size to buy. Drill that hole out and run a tap in, install heli coil and your good to go for all eternity.

They are extremely east to install. I thought I was drilling straight, but apparently I wasn't, so the stud is at an angle but it works with some coaxing to get the exhaust bolted up. I was pissed when I saw the stud at an angle. But it's in the truck and things are snug so all is well.

I spray painted the mainfolds with Ace Hardware 1000* Gloss Black paint. I know it won't last, but it will look good for the photo session before start-up. :) I will put those pics on my build thread when I get them taken.
 

Attachments

  • 26 Helicoil 1.jpg
    26 Helicoil 1.jpg
    96.7 KB · Views: 57
  • 27 Helicoil 2.jpg
    27 Helicoil 2.jpg
    96.2 KB · Views: 54

Irishman999

Full Access Member
Joined
Jul 30, 2010
Posts
6,989
Reaction score
202
Location
Safford Arizona
First Name
Jason
Truck Year
1985
Truck Model
K-1500 High Sierra
Engine Size
305
I did the same thing, one of my studs was a little off.

If you ever wonder about the strength of a heli coil I used one on a connecting rod in a briggs lawn mower engine. It held the bearing cap on so they must be strong.
 

DoubleDingo

Full Access Member
Joined
Jul 3, 2012
Posts
10,243
Reaction score
14,609
Location
Right where I am
First Name
Bagoomba
Truck Year
1981
Truck Model
81-C20 Silverado Camper Special-TH400-4.10s
Engine Size
Carb'ed Vortec 350
I did the same thing, one of my studs was a little off.

If you ever wonder about the strength of a heli coil I used one on a connecting rod in a briggs lawn mower engine. It held the bearing cap on so they must be strong.

That's good to know. I have 9 more of them in case I need them in the future. Definitely a worth while fix.
 

Speakfordadead

Full Access Member
Joined
Aug 28, 2014
Posts
83
Reaction score
0
Location
Woodland WA
First Name
Jeanne
Truck Year
1975 1978 1980
Truck Model
C20's Camper Spc/Sub
Engine Size
350 Targetmaster/454
Yes Canada has lots of studs LOL

The brass nuts are the way to go!

^^^^ True.... been to Canada shopping for Studs.... they got lots....

IMO Brass nuts and grade five bolts are the best.... but I use Donuts.... not to be confused with doughnuts.....:)

As for pipes... if you are looking for torque; 2 into 1 magnaflow and 2 3/4 pipe in, 3 in out.... HP is X-Pipe territory.... I like to run the pipe out the passenger side.... that way I don't have to listen to it

just my .02
 

towjoe

Full Access Member
Joined
Jul 22, 2012
Posts
695
Reaction score
136
Location
Lafayette,IN
First Name
joe
Truck Year
78,80,81,81,86,88,89
Truck Model
K30's or V3500's
Engine Size
6.2, 454
we just swapped the engine out in our 88 c1500 service truck. all 6 studs broke off on exhaust. I ended up going to local autozone and buying new mainfolds with all hardware, and gaskets for $89 each. I found a exhaust shop that done afterhour work and for $200 more it has a quiet exhaust system with no headaches. Defanatly the best route when company picked up the bill.
 

chengny

Full Access Member
Joined
Feb 22, 2012
Posts
4,086
Reaction score
1,008
Location
NH
First Name
Jerry
Truck Year
1986
Truck Model
K3500
Engine Size
350/5.7
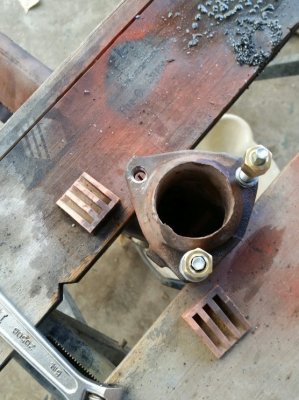
I have stayed out of this discussion, mainly because my preferred type of exhaust manifold/cylinder head fasteners is often dismissed out of hand. I use 316 stainless steel bolts - with a stainless lock washer.

316 stainless is widely used in the marine industry because of it's superior corrosion resistance. It's that corrosion resistance makes these fasteners perfect for exhaust manifold applications. If the bolts (and the threads in the cylinder head) are properly prepped and installed, they clamp and hold the manifold/head joint as well as any mild steel bolt. And most importantly, even after years of service, they can be easily released and backed out.

The yield strength approaches that of a grade 5 bolt (65,000 vs. 80,000 psi) - and the addition of a lock washer brings those numbers even closer.

The bolt heads never rust or round off, so wrenches/sockets always fit tightly to the flats.

As noted above, if/when removal is necessary - it is extremely easy. They generally break free with a single pull of the wrench. And once released (because there is never any corrosion at the thread interface) they back out like they were installed the day before.

They have a nice appearance - almost like chrome if you don't look too closely. They only go for about twice the cost of a grade 5 bolt. They can be used over and over.

Alright now - about the galling issue. Yep it's a fact, without taking the proper steps, threading stainless and mild steel together can be a disaster.

But if the following 3 rules are followed, galling and seizing are not an issue:

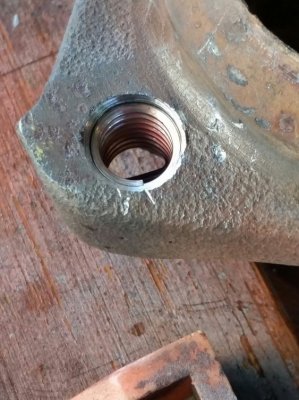
1. Carefully chase - and thoroughly clean - the mild steel threads before engagement. Do this every time, not just when initially making up the joint.

2. Apply a liberal amount of nickel based anti-seize to the bolt threads.

3. Bring the bolts up to final torque slowly and in several steps. The galling process begins during initial tightening and once begun, it becomes self perpetuating. Galling is primarily caused by heat generated at the thread faces due to friction. The other major factors are rough thread surfaces, debris between the threads and lack of lubrication (see the previous rules) . Bringing the bolts up to final torque in several smooth, slow steps drastically reduces the amount of frictional heat generated - and the bolt gets tightened without the galling process ever even starting.


You must be registered for see images attach
 

DoubleDingo

Full Access Member
Joined
Jul 3, 2012
Posts
10,243
Reaction score
14,609
Location
Right where I am
First Name
Bagoomba
Truck Year
1981
Truck Model
81-C20 Silverado Camper Special-TH400-4.10s
Engine Size
Carb'ed Vortec 350
we just swapped the engine out in our 88 c1500 service truck. all 6 studs broke off on exhaust. I ended up going to local autozone and buying new mainfolds with all hardware, and gaskets for $89 each. I found a exhaust shop that done afterhour work and for $200 more it has a quiet exhaust system with no headaches. Defanatly the best route when company picked up the bill.

That's not a bad way to go.
 

Forum statistics

Threads
42,214
Posts
911,460
Members
33,718
Latest member
DamnTexan77
Top