Huck's daily - 2005 Z71 crewcab

Disclaimer: Links on this page pointing to Amazon, eBay and other sites may include affiliate code. If you click them and make a purchase, we may earn a small commission.

TotalyHucked

Full Access Member
Joined
Feb 24, 2020
Posts
4,703
Reaction score
15,567
Location
Auburn, Georgia
First Name
Zach
Truck Year
1985
Truck Model
Sierra 1500
Engine Size
5.3
Truck looks good, nice work. Thanks for taking the time to document your journey. Lots of good information here.
Thanks! I try to document as best I can, but I get so focused/buried in the work that I don't end up taking enough detailed pictures for write-ups/how-tos.
 

Turbo4whl

Supporting Member
Supporting Member
Joined
Oct 30, 2019
Posts
3,357
Reaction score
7,965
Location
Downingtown, PA
First Name
Wayne
Truck Year
1974
Truck Model
Jimmy
Engine Size
350
Best investment I've made in a while. Not because it works, but because I haven't needed it yet.
This is so true!
Welp. Very little progress tonight. Galled up the threads trying to reinstall the balancer. So a tap and a proper installer has been ordered. Guess my luck ran out. I've done several of these just sucking them back on with the crank pulley. Should've known better. Oh well.
Little late now, but if you want to pull on a balancer without a special tool, here is how. Use a stud, not a bolt. Thread the stud all the way in. Then flat washers and a nut on the stud, and pull it on. If you run out of threads on the stud, remove it and replace with a shorter stud or add more flat washers. This way you have all the crank threads holding the stud and not relying those threads to pull on the balancer.
 

WFO

Full Access Member
Joined
Jan 6, 2017
Posts
3,913
Reaction score
5,488
Location
Texas Panhandle
First Name
Dan
Truck Year
1986
Truck Model
K20
Engine Size
350
This is so true!

Little late now, but if you want to pull on a balancer without a special tool, here is how. Use a stud, not a bolt. Thread the stud all the way in. Then flat washers and a nut on the stud, and pull it on. If you run out of threads on the stud, remove it and replace with a shorter stud or add more flat washers. This way you have all the crank threads holding the stud and not relying those threads to pull on the balancer.
That's how I do it too. I've got a small thrust bearing that I also use with that method.
 

TotalyHucked

Full Access Member
Joined
Feb 24, 2020
Posts
4,703
Reaction score
15,567
Location
Auburn, Georgia
First Name
Zach
Truck Year
1985
Truck Model
Sierra 1500
Engine Size
5.3
This is so true!

Little late now, but if you want to pull on a balancer without a special tool, here is how. Use a stud, not a bolt. Thread the stud all the way in. Then flat washers and a nut on the stud, and pull it on. If you run out of threads on the stud, remove it and replace with a shorter stud or add more flat washers. This way you have all the crank threads holding the stud and not relying those threads to pull on the balancer.
Yeah I started to go buy some all-thread but when I found the proper tool with a nice thrust washer on Amazon that could be here the next day I just decided to go that route. I'll never test my luck drawing it on with the bolt again lol
 

TotalyHucked

Full Access Member
Joined
Feb 24, 2020
Posts
4,703
Reaction score
15,567
Location
Auburn, Georgia
First Name
Zach
Truck Year
1985
Truck Model
Sierra 1500
Engine Size
5.3
Did some more piddling Thursday night. Got the new 40k trans cooler mounted. You can see how dinky the stock one is

You must be registered for see images attach


Somebody on another forum from years ago posted about using these adapter fittings from Napa, they screw right into the 40k and the stock lines just pop right in

You must be registered for see images attach


This is how the stock cross bar sits

You must be registered for see images attach


I was able to just flip it over and cut a relief in it for the driver's side line to come through

You must be registered for see images attach


A little off center but once it's painted black you won't see it and this way I don't have to mess with the PS cooler (it's lower ear is in the way of centering this cooler)

You must be registered for see images attach
 

TotalyHucked

Full Access Member
Joined
Feb 24, 2020
Posts
4,703
Reaction score
15,567
Location
Auburn, Georgia
First Name
Zach
Truck Year
1985
Truck Model
Sierra 1500
Engine Size
5.3
Ran the self tappers in the bottom mounts. I'll probably go back and bolt it as well for good measure. Self tapper on the top driver's side and had to use some of the provided strapping for the pass side. For the bolt just to the left of the latch in the pic below, I used 3 drill bits, stepping up size each time. I had ~2" or so from the back of that latch mount to the condenser so I was trying to be super careful. First two went fine, the last one grabbed hard and went straight into the condenser :suicide: I pulled it back out and looked, didn't hear any hissing or see anything coming out. IT WENT IN JUST THE FINS!! I won't know if it nicked any of the tubes till I start using it and it builds pressure but I think I lucked out!

Then massaged the stock hardlines very carefully by hand to get them to play nice in their new locations.

You must be registered for see images attach


Dusted on some black

You must be registered for see images attach


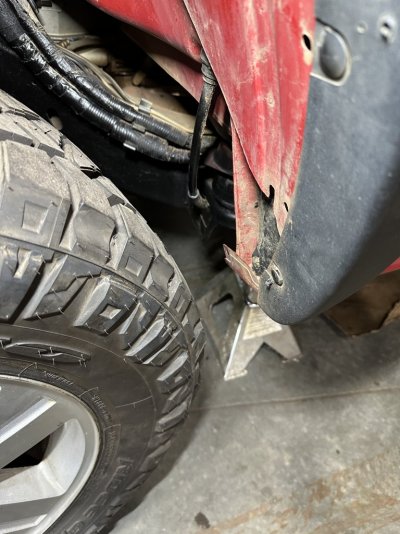
Added some hose to protect the hard lines from rubbing on the core support

You must be registered for see images attach


Relocated the ambient air temp sensor

You must be registered for see images attach


Then cut the air diverter to clear the new line locations and reinstalled

You must be registered for see images attach
 

TotalyHucked

Full Access Member
Joined
Feb 24, 2020
Posts
4,703
Reaction score
15,567
Location
Auburn, Georgia
First Name
Zach
Truck Year
1985
Truck Model
Sierra 1500
Engine Size
5.3
So Friday and Saturday I didn't work on the truck cuz we went down to Three Taverns Brewery for the Friday night C10s in the City pre-party and then obviously the show Saturday. The GF had to be up early to go do a pet-sit Saturday so I went to the shop after dropping her off at the house.

Started with torqueing down the balancer bolt. Picked up this nifty tool that locks the flywheel in

You must be registered for see images attach


You must be registered for see images attach


I have no idea how I did it, apparently I had to give a blood sacrifice to get it to spec lol

You must be registered for see images attach


Then moved onto getting the bumper final mounted. Had to re-drill the holes for the outer brackets

You must be registered for see images attach


You must be registered for see images attach
 

TotalyHucked

Full Access Member
Joined
Feb 24, 2020
Posts
4,703
Reaction score
15,567
Location
Auburn, Georgia
First Name
Zach
Truck Year
1985
Truck Model
Sierra 1500
Engine Size
5.3
Then moved onto clearancing for tires. In the past I've never run anything larger than a 33" tire (295/70/17, 305/55/20s) on these trucks which all physically measure between 31.5-32". I usually could get away with bending up the tab on the driver's body mount at the rear and trimming the plastic inner fenders. But I've also run spacers before and had to trim alot cuz of the scrub radius. These 35s measure 33.5". I probably wouldn't have rubbed except maybe hitting a bump while half turned but I didn't wanna chance it. Plus if I decide to run spacers or wider/wheels and tires, I can and won't have to worry about it in the future.

This is at the rear

You must be registered for see images attach


And this is the front at the valence

You must be registered for see images attach


So this is the main concern. I did what's called the "NorCal Mod". We're gonna bend that horizontal tab down and cut/bend the vertical piece, then bend up the lower tab back up and it'll go further back, giving another inch or so more clearance

You must be registered for see images attach


You must be registered for see images attach
 

Attachments

  • IMG_7205.JPG
    IMG_7205.JPG
    159.1 KB · Views: 6

TotalyHucked

Full Access Member
Joined
Feb 24, 2020
Posts
4,703
Reaction score
15,567
Location
Auburn, Georgia
First Name
Zach
Truck Year
1985
Truck Model
Sierra 1500
Engine Size
5.3
You must be registered for see images attach


Then make a couple slices

You must be registered for see images attach


Beat it over with a hammer

You must be registered for see images attach


Then beat the bottom back up. Not pretty but it'll do the job. Looking at it after the fact, I probably shoulda just cut the vertical piece off and then I could've gained more room. I can always go back and do some more if need be

You must be registered for see images attach


Then some paint so it won't rust

You must be registered for see images attach
 

TotalyHucked

Full Access Member
Joined
Feb 24, 2020
Posts
4,703
Reaction score
15,567
Location
Auburn, Georgia
First Name
Zach
Truck Year
1985
Truck Model
Sierra 1500
Engine Size
5.3
Same thing on the other side

You must be registered for see images attach


You must be registered for see images attach


You must be registered for see images attach


Then just nicked the corners off the valence and trimmed the front overhang of the inner fenders. All I need to do now is trim the backs of the inner fenders a tad and secure them to where I folded the metal back

You must be registered for see images attach
 

TotalyHucked

Full Access Member
Joined
Feb 24, 2020
Posts
4,703
Reaction score
15,567
Location
Auburn, Georgia
First Name
Zach
Truck Year
1985
Truck Model
Sierra 1500
Engine Size
5.3
I got to stop dragging my ass and get a tru-cool installed on the Hoe.
Those fittings made it stupid easy. I was kinda dreading it but it wasn't bad. One of my lines is weeping though, so I'll make up some custom braided AN lines at some point since I have 2 partial kits laying around
 

Forum statistics

Threads
45,607
Posts
987,328
Members
38,691
Latest member
blackbeard2011
Top