

You are using an out of date browser. It may not display this or other websites correctly.
You should upgrade or use an alternative browser.
You should upgrade or use an alternative browser.
What have you done to your square lately??
- Thread starter Old77
- Start date
Disclaimer: Links on this page pointing to Amazon, eBay and other sites may include affiliate code. If you click them and make a purchase, we may earn a small commission.
TotalyHucked
Full Access Member
- Joined
- Feb 24, 2020
- Posts
- 7,074
- Reaction score
- 26,491
- Location
- Auburn, Georgia
- First Name
- Zach
- Truck Year
- 1985
- Truck Model
- Sierra 1500
- Engine Size
- 5.3
Rebuilt my HVAC box with a new heater core, new seals and cleaned/lubed all the moving components. Then after lots of cussing and about 3hrs, finally got it back in the truck. That is not a fun job
You must be registered for see images attach
You must be registered for see images attach
You must be registered for see images attach
82sbshortbed
Why like that?
- Joined
- Mar 1, 2018
- Posts
- 17,648
- Reaction score
- 59,746
- Location
- SE Texas
- First Name
- Doug
- Truck Year
- 1982, 1984
- Truck Model
- 1500 shortbed, 1500 longbed
- Engine Size
- 454, 350
Sadly I have not done anything to it in a few weeks. 
Soundmound
Full Access Member
- Joined
- Feb 15, 2022
- Posts
- 1,892
- Reaction score
- 5,904
- Location
- Aiken, SC
- First Name
- Dave
- Truck Year
- 1984
- Truck Model
- Scottsdale
- Engine Size
- 305
Ha! I'm redoing mine for the second time... discovered I had a bad vacuum valve in the HVAC controls after getting it all back together. Since it was out again I decided to redo all the gaskets properly, including pulling and "restapling" the one on the defrost door. I hope to reinstall it tonight barring further issues.Rebuilt my HVAC box with a new heater core, new seals and cleaned/lubed all the moving components. Then after lots of cussing and about 3hrs, finally got it back in the truck. That is not a fun job
You must be registered for see images attach
You must be registered for see images attach
You must be registered for see images attach
You must be registered for see images attach
You must be registered for see images attach
You must be registered for see images attach
TotalyHucked
Full Access Member
- Joined
- Feb 24, 2020
- Posts
- 7,074
- Reaction score
- 26,491
- Location
- Auburn, Georgia
- First Name
- Zach
- Truck Year
- 1985
- Truck Model
- Sierra 1500
- Engine Size
- 5.3
Is the defrost door supposed to have gasket all the way around like that? I only replaced the 2 little strips at the end where the staples were. I pray I don't have to do this again for a very long time. If I do, I will redo the entire system lolHa! I'm redoing mine for the second time... discovered I had a bad vacuum valve in the HVAC controls after getting it all back together. Since it was out again I decided to redo all the gaskets properly, including pulling and "restapling" the one on the defrost door. I hope to reinstall it tonight barring further issues.You must be registered for see images attachYou must be registered for see images attachYou must be registered for see images attach
Soundmound
Full Access Member
- Joined
- Feb 15, 2022
- Posts
- 1,892
- Reaction score
- 5,904
- Location
- Aiken, SC
- First Name
- Dave
- Truck Year
- 1984
- Truck Model
- Scottsdale
- Engine Size
- 305
Not en
Not entirely sure TBH. The old one was crumbling goo and appeared to have torn at the ends. As I tested the HVAC controls I noticed there was a gap between the door and case when fully closed. I assume you'd not want blowby if the door is meant to seal. I chose to gasket on attempt two rather than have to do an attempt three lol. Plus, the surface rust pattern indicated there was something there at one time.Is the defrost door supposed to have gasket all the way around like that? I only replaced the 2 little strips at the end where the staples were. I pray I don't have to do this again for a very long time. If I do, I will redo the entire system lol
- Joined
- Aug 3, 2010
- Posts
- 35,429
- Reaction score
- 44,744
- Location
- Usually not in Ohio
- First Name
- Andy
- Truck Year
- '77, '78, '79, '84, '88
- Truck Model
- K5 thru K30
- Engine Size
- 350-454
Never in the unfortunate multitude of brake failures I've had on GM vehicles has that valve "shut off" anything. If it did you wouldn't get that spongy pedal and half of the master emptying itself. All it does is turn on the warning light.
If the system is that neglected it is possible that the assembly is plugged with rust. You can take the back end of the valve (the rear proportioning side) and see how cruddy it is in there. You could also loosen the line to the rear brakes and see if you get fluid out of the valve at that point.
Same here. If I had a nickel for every time I lost a rear brake line, the pedal squished to the floor and I lost all my brake fluid... I wouldn't be rich, but I'd have a big pile of nickels.
Ajax19
Full Access Member
- Joined
- May 11, 2022
- Posts
- 428
- Reaction score
- 1,760
- Location
- Socal
- First Name
- Ajax
- Truck Year
- 1983
- Truck Model
- K3500
- Engine Size
- 454
In my case valve activated and brakes were firmSame here. If I had a nickel for every time I lost a rear brake line, the pedal squished to the floor and I lost all my brake fluid... I wouldn't be rich, but I'd have a big pile of nickels.
AZ Highlander
Full Access Member
- Joined
- Nov 15, 2022
- Posts
- 345
- Reaction score
- 1,005
- Location
- Prescott AZ
- First Name
- Frank
- Truck Year
- 1987
- Truck Model
- K15 (aka V1500)
- Engine Size
- 350 (5.7L)
I have firm pedal as well.In my case valve activated and brakes were firm
Front is flowing as expected.
I got rear flow to the rear hose block on the rear diff last week, changed nothing upstream of that junction, but now have no flow there either.
Maybe I will take the compressor and blow out the line from the valve to the junction on the rear diff just to ensure the line is open for business.
New PV2 valve should arrive tomorrow.
Dryriver1
Full Access Member
- Joined
- Jan 21, 2023
- Posts
- 766
- Reaction score
- 2,266
- Location
- Texas
- First Name
- Robert
- Truck Year
- 1984, 1999,
- Truck Model
- 1984 Chevy Silverado K10, 1999 Chevy 2 door Tahoe 4x4
- Engine Size
- 350 cid, 5.7
Here is an explanation of how a combination valve should function.
How Do Combination Valves Work?
techtalk-mpbrakes-com.cdn.ampproject.org
Hello @Ricko1966 !
I hope all is well. I just wanted to say that that was an excellent and very informative article.
Thank you for always imparting, teaching, helping, and passing on some very good knowledge to all of the GMSB Buddies along with many of the other members here that help out in the same way.
Thank you again!
Be well and stay safe out there.
Best wishes to you and all of your loved ones always!
Dryriver1
Powerhouse Ranch
3G Connoisseur
- Joined
- Jan 6, 2021
- Posts
- 1,526
- Reaction score
- 2,988
- Location
- PA
- First Name
- Luke
- Truck Year
- '80, '86, '88
- Truck Model
- C25, K5, V15
- Engine Size
- 454, 379, 350
Rebuilt my HVAC box with a new heater core, new seals and cleaned/lubed all the moving components. Then after lots of cussing and about 3hrs, finally got it back in the truck. That is not a fun job
You must be registered for see images attach
You must be registered for see images attach
You must be registered for see images attach
no it is not. kudos bud
TotalyHucked
Full Access Member
- Joined
- Feb 24, 2020
- Posts
- 7,074
- Reaction score
- 26,491
- Location
- Auburn, Georgia
- First Name
- Zach
- Truck Year
- 1985
- Truck Model
- Sierra 1500
- Engine Size
- 5.3
When they cut my truck down, they literally cut the ebrake cables and welded them back together with a nut in the middle. So when I pulled my rear end out to have it rebuilt, I cut everything off.
So a few months back, I was adjusting the rear brakes and put new cables on each side while I was there and just zip-tied them in the frame. Finally put the new front e-brake cable on with all new hardware, hooked it all up and I have an Ebrake for the first time in 2 years!
So now that that was done, I put my freshly bedlined driver’s side SloshTub back in
…And had to promptly pull the hardware back out to get a few pinched wires out
So a few months back, I was adjusting the rear brakes and put new cables on each side while I was there and just zip-tied them in the frame. Finally put the new front e-brake cable on with all new hardware, hooked it all up and I have an Ebrake for the first time in 2 years!
You must be registered for see images attach
You must be registered for see images attach
So now that that was done, I put my freshly bedlined driver’s side SloshTub back in
You must be registered for see images attach
…And had to promptly pull the hardware back out to get a few pinched wires out
Last edited:
Ajax19
Full Access Member
- Joined
- May 11, 2022
- Posts
- 428
- Reaction score
- 1,760
- Location
- Socal
- First Name
- Ajax
- Truck Year
- 1983
- Truck Model
- K3500
- Engine Size
- 454
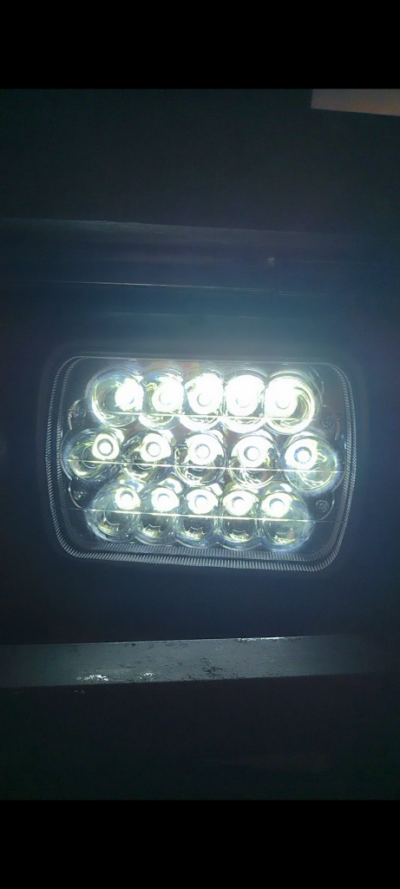
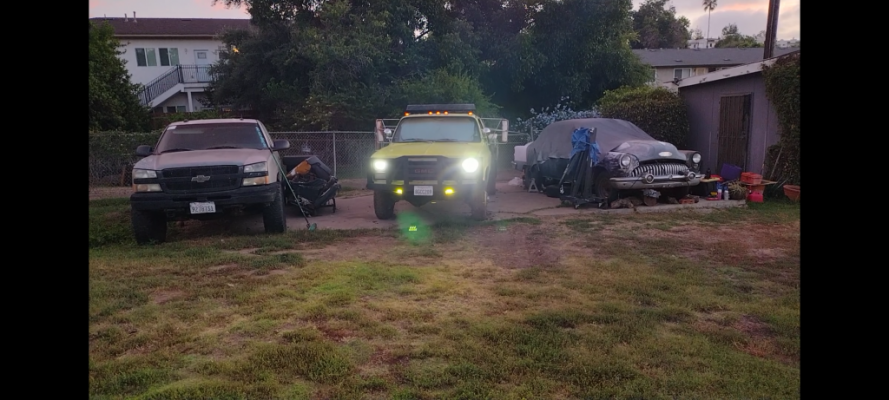
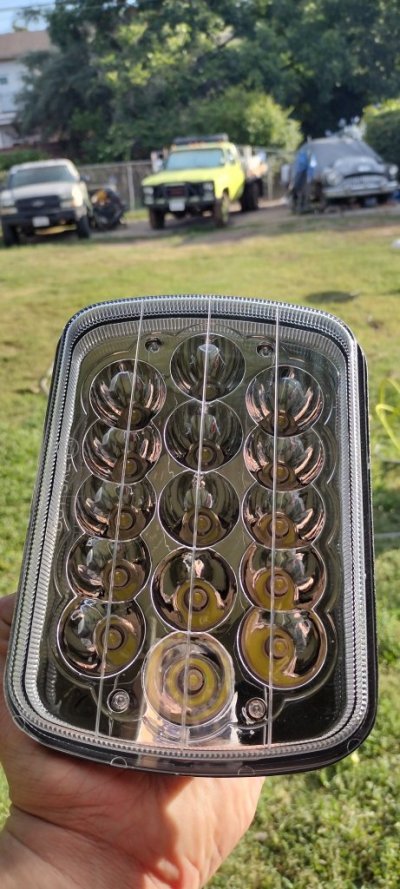
New led headlights old glass ones literally fell apart when I took the ring off so it was just in time almost dark here so I'll get to test them out in a bit
Attachments


AZ Highlander
Full Access Member
- Joined
- Nov 15, 2022
- Posts
- 345
- Reaction score
- 1,005
- Location
- Prescott AZ
- First Name
- Frank
- Truck Year
- 1987
- Truck Model
- K15 (aka V1500)
- Engine Size
- 350 (5.7L)
oil and filter change for the 350 sbc today!
mxer147
83 K20, 350 vortec, 465, 208, 14/10, 4.10, 33s
- Joined
- Feb 8, 2023
- Posts
- 950
- Reaction score
- 3,590
- Location
- Colorado
- First Name
- Jack
- Truck Year
- 1983
- Truck Model
- k20
- Engine Size
- 350
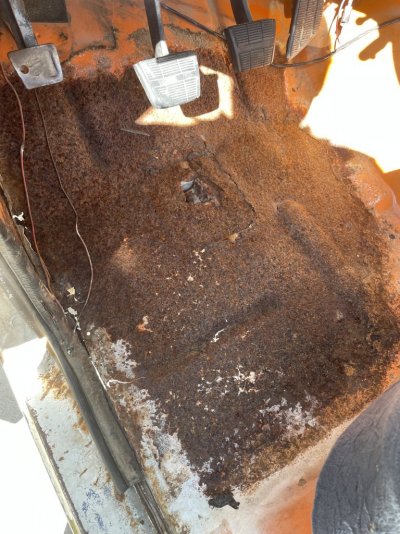
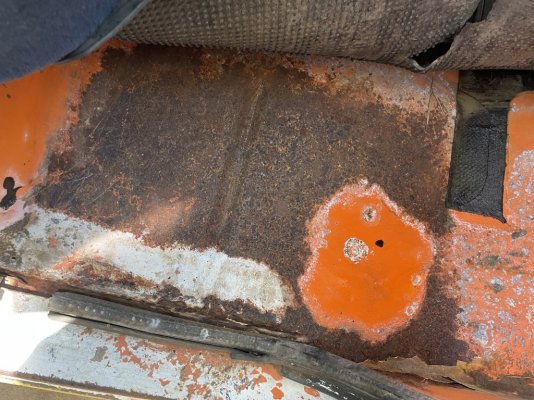
DA sanding the inside of the cab and cleaned up the caulk that was holding on the door weather seals. I pretty much stripped the inside which revealed really bad rust on the driver floor pan which was a result of carpet padding holding moisture. Im not happy about the extra work but that’s how it goes sometimes so I’m just gonna roll with it. My welding skills should improve at the least. New floor pans arrived today which I will weld over the winter months on descent weather days. I’m still working to spray some primer and paint before the snow flys.
Attachments
Last edited:
Similar threads
- Replies
- 10
- Views
- 2K
- Replies
- 7
- Views
- 1K
- Replies
- 19
- Views
- 2K