- Joined
- Feb 22, 2022
- Posts
- 407
- Reaction score
- 723
- Location
- Spartanburg SC
- First Name
- Geoff
- Truck Year
- 1985
- Truck Model
- C10
- Engine Size
- 305
So I finally got to my vent windows. While I’m not going to post a thread on the finished product, or even post this like I’m an expert, I thought I might post a couple tips and lessons learned.
First, there are a lot of decent videos on this and some that are not so decent. My take is that a lot of the videos skip the real hard part, which for me is getting the seal into the channel on the frame.
Here is a good video by brothers (I do not work for or promote any products).
Here is another by Chris craft.
My tips from working on a 2 piece seal (this is assuming you have the window assembly out of your door. I have no idea how you would redo the seals otherwise):
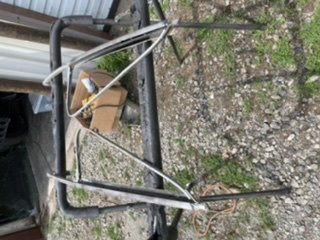
1. There are a few ways to go about disassembling the frames to get the channel seal right. I removed the hinge rivets from the frame to keep the hinge intact. Some disassemble the hinge itself (I think the videos above do).
2. I drilled the frame rivet at the top of the window frame to provide space for the seal to go in. This picture is after I have already removed the rivet and replaced the seal. I used a small pair of vice grips to hold the frame together while I finished putting the frame seal in.
3. Use lubricant and lots of it. I used quick detailer (Griots speed shine) because I had a ton of it. It makes all the difference.
4. Oddly, one side of the seal is easier to use as your “working side” when seating than the other. And I think this changes as you move along the seal. The side that has more “breaks” in the seal is the easiest to have as your working side (meaning the side you stuff in the channel while the other side is resting in it), since the continuous side is the one you want to have already resting in the channel.
5. Measure twice. Be sure you note that the hinge side of the window is on the outside of the truck. I screwed up and put the seal in backward first (yes. It was a painful mistake).
This is incorrect:
This is correct (hinge gap on exterior side of door):
6. When prepping, beware that the different finish areas have different exposures. The inside panel and all the metal I did with Krylon. The exterior, though, I decided to powder coat because I figure the spray bomb wouldn’t last long. I have a kiln so was able to put the whole assembly in, and the oe chrome and paint on the interiors side held up ok at 400 degrees.
I blasted my frames overall and powder coated only the outside edge. I also powder coated the window frames.
Anyhow. So far so good. For what it’s worth, because of my mistake I got pretty fast at placing the seals in the frame. I think the first one took me an hour and a half and I didn’t even put the second part of the seal in. The second one maybe 40 mins (including the second seal), and the third (repeat) maybe 25 from stripped frame to fully installed seals with the top rivet re-installed (not done with window glass yet).
First, there are a lot of decent videos on this and some that are not so decent. My take is that a lot of the videos skip the real hard part, which for me is getting the seal into the channel on the frame.
Here is a good video by brothers (I do not work for or promote any products).
xc_hide_links_from_guests_guests_error_hide_media
Here is another by Chris craft.
xc_hide_links_from_guests_guests_error_hide_media
My tips from working on a 2 piece seal (this is assuming you have the window assembly out of your door. I have no idea how you would redo the seals otherwise):
1. There are a few ways to go about disassembling the frames to get the channel seal right. I removed the hinge rivets from the frame to keep the hinge intact. Some disassemble the hinge itself (I think the videos above do).
You must be registered for see images attach
2. I drilled the frame rivet at the top of the window frame to provide space for the seal to go in. This picture is after I have already removed the rivet and replaced the seal. I used a small pair of vice grips to hold the frame together while I finished putting the frame seal in.
You must be registered for see images attach
3. Use lubricant and lots of it. I used quick detailer (Griots speed shine) because I had a ton of it. It makes all the difference.
4. Oddly, one side of the seal is easier to use as your “working side” when seating than the other. And I think this changes as you move along the seal. The side that has more “breaks” in the seal is the easiest to have as your working side (meaning the side you stuff in the channel while the other side is resting in it), since the continuous side is the one you want to have already resting in the channel.
5. Measure twice. Be sure you note that the hinge side of the window is on the outside of the truck. I screwed up and put the seal in backward first (yes. It was a painful mistake).
This is incorrect:
You must be registered for see images attach
This is correct (hinge gap on exterior side of door):
You must be registered for see images attach
6. When prepping, beware that the different finish areas have different exposures. The inside panel and all the metal I did with Krylon. The exterior, though, I decided to powder coat because I figure the spray bomb wouldn’t last long. I have a kiln so was able to put the whole assembly in, and the oe chrome and paint on the interiors side held up ok at 400 degrees.
I blasted my frames overall and powder coated only the outside edge. I also powder coated the window frames.
Anyhow. So far so good. For what it’s worth, because of my mistake I got pretty fast at placing the seals in the frame. I think the first one took me an hour and a half and I didn’t even put the second part of the seal in. The second one maybe 40 mins (including the second seal), and the third (repeat) maybe 25 from stripped frame to fully installed seals with the top rivet re-installed (not done with window glass yet).