Its not too bad. I do plan on stocking up on PB blaster and soaking all the bolts a couple days ahead of time.
There is one common thing that can wrong. And if it happens, it will quickly turn this job into a struggle.
What started out to be a pleasant Saturday afternoon that only required pulling 4 bolts, sliding in the new mounts and replacing the bolts (and sipping beer in the sunshine with your advisers) can become a weekend long nightmare. You'll end up spending hours on your back, getting rust in your eyes, swearing and drinking beer by yourself (the advisers, having picked up the scent of actual work, will have fled the scene).
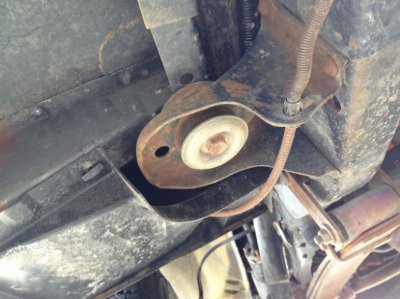
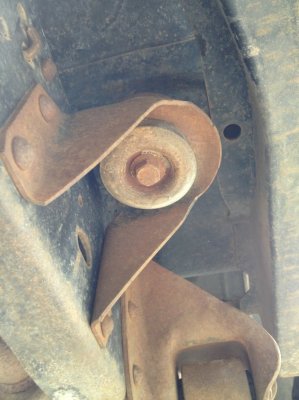
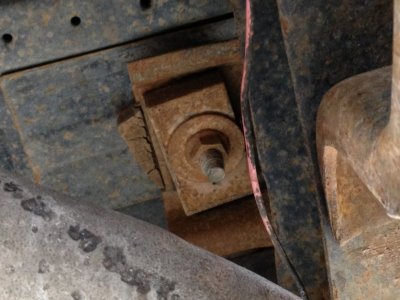
That would be if your "captive nuts" - that the forward mount bolts screw into - decide to make a break for freedom. These nuts are actually just 2" X 2" square steel plates with a hole drilled in the center and tapped to accept the mount bolts. The are located within the cab floor supports (normally hidden and inaccessible). They are sometimes still held captive by a couple of tack welds but the welds are usually rusted away or break free with the application of any real torque on the bolts.
When this happens, the mounting through-bolts will spin endlessly (and easily as well, due to your pre-application of PBlaster).
A little trick from the body guys:
Never mind spraying the bolts with penetrating oil from under the truck - gravity will being fighting your efforts. The best way to soak the rusty nuts is to either drill holes through the sides of the cab floor supports. An even better method is to drill down through the cab floor and spray from the top.
Do this for a week or two before you go to pull the mount bolts and maybe you'll get lucky.
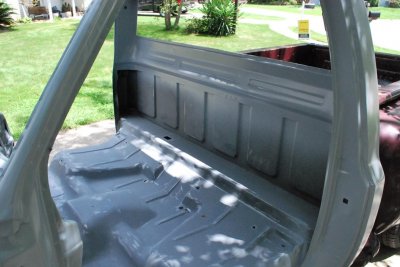
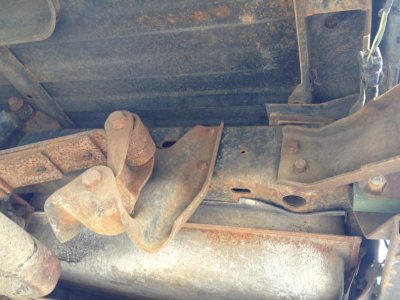
A picture of a real bad cab floor/mount situation and the locations and associated parts for your job ( I think - the vehicle pictured looks like a Blazer/Jimmy)
You must be registered for see images attach
You must be registered for see images attach