Paint manufacturer recommendations for the DIY

Disclaimer: Links on this page pointing to Amazon, eBay and other sites may include affiliate code. If you click them and make a purchase, we may earn a small commission.

andybflo

Junior Member
Joined
Aug 13, 2020
Posts
29
Reaction score
46
Location
Western NY
First Name
Andrew
Truck Year
1986
Truck Model
C-10 Silverado
Engine Size
5.3 LM7/4L60E
1) I'm trying to stay close to the original colors.
- a silver metallic
- rosedale red

2) I'm aiming for a daily-driver quality. not a show truck by far, but something i can take hunting and maybe the local car show once-per-year.

3) No salt and would spend most of its life under a carport w/ open sides.

Grit is correct, i'm really looking for recommendations. For the past year, i was planning on a single-stage but after speaking with several local people / shops, i'm starting to lean toward base / clear. Additionally, this project is preparing me for bodywork i plan to do when i retire, a 1955 Chevy Coupe, i've had for years. It will be base/clear, this alone may be the deciding factor in my case but i'm still undecided

I'd shoot Transtar 2K epoxy for a base, it's good, inexpensive, and helps to keep corrosion under control especially if you have and repaired rust. If you have mud/rust indentations, consider a high build like Evercoat Slick Sand. It hides a lot of first timer/low hour issues (and gets sprayed on every Corvette we do, because fiberglass sucks.)

I'd spend for a higher quality paint for metallics/reds. Red especially is expensive to get good depth. Go R-M Diamont, in my opinion. What you spend now for your base will pay off in a decade. The solids content and quality of pigments do make a massive difference in the future. I always argue with clients on paint, until I show them cars we've done, or we walk around a car show. With an eye, especially with reds and blacks, you can tell cheap paint from good paint a mile away (my wife is currently trained to pick them out.)

For a clear, in a carport, in the south? I'd go R-M DC92. It's about as good as you'll get. It *will* be more expensive than some of the above, but paint, much like engine parts... You usually get what you pay for.

Get a junk panel, from anything, including a U-Pull it yard. I snagged a couple of Fenders when they had $20 panel days from random junk that looked easy to unbolt when I was learning to paint. Get the cheapest paint and primer you can. Learn to prep, block sand, learn about distance from panels, your spray controls on the gun, pressure, all that stuff on a junk panel with cheap paint. Sand, bondo, prime, finish, repeat until it looks good in sunlight, fluorescent, LED, anything you can find. Spend a few evenings getting used to it.

Be vigilant about breaking down your gun and cleaning, and prep. Prep. Prep. Prep. Prep again.

All that prep is why I leave bodywork to my business partner. I can paint a core support or A-Arms or a tranny x-member or something; I avoid stuff that sees sunlight.
 

Grit dog

Full Access Member
Joined
May 18, 2020
Posts
5,929
Reaction score
9,787
Location
Washington
First Name
Todd
Truck Year
1986
Truck Model
K20
Engine Size
454
Based on what you said, 2 stage is basically better in most regards.
1. It will sit outside. (Carport is better than direct sun but it’s not a garage)
2. You’re painting metallic. Not good for color sanding a single stage metallic. Better be good enough painter that no wet sanding is needed. It will alter the appearance and very likely the finish won’t be consistent after sanding.
3. Overall cost. Maybe a push but you don’t need a lot of base coat. And base costs less than single stage and so does clear. If you’re talking equal mil thickness.
4. The cost of red paint specifically. Red costs a big % more than white, light colors and even most dark colors. If the truck is red with silver stripe (assuming) you’ll easily need 3 gallons of red single stage. 2 if you’re not doing the bed. And a gallon of silver. If you go 2 stage, 1 gal of red base and 1 qt of silver will do the whole truck inside and out top to bottom including inside the bed. With some left over.
And 1 qt of silver. I used exactly half a quart of the dark blue base coat on the blue truck. (I used a little more because I painted some parts at a differnet time and a couple re-sprays of partial panels). If I didn’t bumble that, I could have made a pint of dark blue base cover it. Barely…
And remember clear is cheaper than paint.
5. If you’re not perfect and you’ll end up wet sanding it, cut and polish, color sanding makes a big damn mess compared to sanding clear!
6. If you’re painting it for the long term, clear coat will absolutely outlast ss apples to apples.

Only real advantages to ss is easier repairs and a little less complicated.
 

DanMcG

Full Access Member
Joined
Jun 28, 2014
Posts
1,076
Reaction score
1,884
Location
Central NY
First Name
Dan
Truck Year
1978 1985
Truck Model
k10 k10
Engine Size
400 350
Look into Motobase, or Wanda, both are reasonably priced products. Southern polyurethane is awesome stuff but limited to a few solid colors.
 

Grit dog

Full Access Member
Joined
May 18, 2020
Posts
5,929
Reaction score
9,787
Location
Washington
First Name
Todd
Truck Year
1986
Truck Model
K20
Engine Size
454
@coolpup32
I just looked harder at your pic. Silver primary color not red.
All the same applies except overall any option is cheaper since much less red needed.
 

coolpup32

Member
Joined
Jan 15, 2022
Posts
35
Reaction score
4
Location
MS
First Name
Jeff
Truck Year
1976
Truck Model
k10
Engine Size
350
@coolpup32
I just looked harder at your pic. Silver primary color not red.
Sorry for the late reply. Yea, silver is the primary, red/burgundy/maroon on the roof and mid-panels. Best i can figure, i can do the red with under 2 quarts and a gallon of silver. I've been working on the hood, cutting out the rust on the front edge and removing the taco shape. I was hoping to prime it tonight but i'm not in the mood.

FWIW, i think i have a pretty good set of guns. I recently purchased the p500 and cc500 from eastwood, i've heard good things (considering their around $300 each) i couldnt justify spending more
 

Grit dog

Full Access Member
Joined
May 18, 2020
Posts
5,929
Reaction score
9,787
Location
Washington
First Name
Todd
Truck Year
1986
Truck Model
K20
Engine Size
454
Yeah idk much about paint guns. IMO it’s 90% setup, proper temperature and technique and about 10% gun. Wish it was 90% gun because I suck at getting the other 3 things right at the same time! Lol.
If using a quality basecoat that mixes 1:1 with reducer, 1qt of maroon (2 qts sprayable) should be enough. I even painted that dark blue over a std gray primer and didn’t use near all of the quart even with the boo boos I made.

I used about 3 qts of the gallon of light blue base. Whole exterior, underside of hood, front of bed, back of cab and entire inside of the bed.
I cheated inside the bed and base coated a similar color first. Extra paint I had.
 

coolpup32

Member
Joined
Jan 15, 2022
Posts
35
Reaction score
4
Location
MS
First Name
Jeff
Truck Year
1976
Truck Model
k10
Engine Size
350
Yeah idk much about paint guns. IMO it’s 90% setup, proper temperature and technique and about 10% gun. Wish it was 90% gun because I suck at getting the other 3 things right at the same time! Lol.
If using a quality basecoat that mixes 1:1 with reducer, 1qt of maroon (2 qts sprayable) should be enough. I even painted that dark blue over a std gray primer and didn’t use near all of the quart even with the boo boos I made.

I used about 3 qts of the gallon of light blue base. Whole exterior, underside of hood, front of bed, back of cab and entire inside of the bed.
I cheated inside the bed and base coated a similar color first. Extra paint I had.

Well I can say if it turns out like junk, i can only blame myself and not my tools!

Thats good info on that dark blue, that should save me quite a bit of money...

I actually tested my cc500 with a custom rustoleum mix for the underside of the hood... i was drunk and hastily sprayed but the color looks really good, just a few runs. i used the rustoleum aluminum and a gloss black.. cant say the exact ratio, but mostly black... Turned out like a metallic graphite, i was quite pleased but i'll never be able to reproduce it.

my bed floor is new, i managed to repair the bed walls... but i'll just do a simple roll-in liner for this. I have not decided what to do on the bed rails, i'm thinking liner as well. There was a tool box, so near the cab has significant rust. I plan to patch best i can and i have a new toolbox already

I cant thank everyone enough for all the feedback!!!
 

greenweenie

Junior Member
Joined
Feb 28, 2022
Posts
14
Reaction score
14
Location
Staunton VA
First Name
Luke
Truck Year
1978
Truck Model
K20
Engine Size
350 SBC
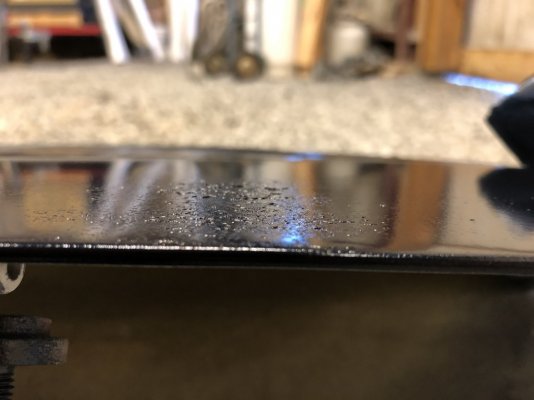
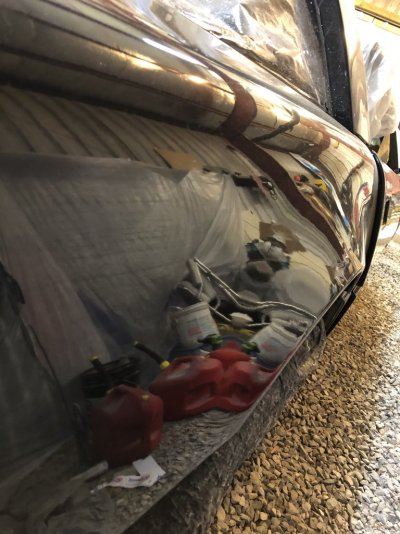
Just my 2 cents, I’ve only ever painted 2 vehicles. The first was an ‘85 Corvette, shot Nason primer, Metallux color, and Nason 2K urethane clear. It was BMW midnight blue, dark color and heavy HEAVY metallic flake. Gorgeous color. The color coat wrinkled up as soon as you laid the first heavy coat. First pic below. I think the paint underneath the primer was garbage (car was resprayed before I owned) and the aggressive reducer in the color coat lifted the garbage paint up off the factory coat. This is partially evidenced by the fact that the wrinkling didn’t happen everywhere. Anywhere the paint did lay well, I buffed out and it looked stellar. Second pic below. It was not cheap all in, but cheaper than PPG. Another thing to note is that I had to go back and touch up some spots later. I could not touch up using an airbrush, I had to repaint the whole panel. Second paint job I did was on my ‘78 Square, it’s the Toyota green they use on their 4Runner (truck in my thumbnail). All I painted was passenger door and the low panel underneath the grill. I’ll likely repaint the hood later. No metallic in it. I used the same Nason primer and this time I used Nason/Axalta single stage. Substrate was much better - either bare metal, factory paint, or dolphin glaze filler. Single stage shot beautifully, turned out great, and I want to say a gallon was about $400 all in, not including primer.
 

Attachments

  • 882671E4-3F36-47E1-A00D-8F2D7B879A0D.jpeg
    882671E4-3F36-47E1-A00D-8F2D7B879A0D.jpeg
    79.8 KB · Views: 54
  • 893B5FA8-1223-44A0-AA67-C62908563AD5.jpeg
    893B5FA8-1223-44A0-AA67-C62908563AD5.jpeg
    157.9 KB · Views: 55
  • AFC3C01F-E90F-4632-92E4-BD9C13E33342.jpeg
    AFC3C01F-E90F-4632-92E4-BD9C13E33342.jpeg
    220.1 KB · Views: 53

Grit dog

Full Access Member
Joined
May 18, 2020
Posts
5,929
Reaction score
9,787
Location
Washington
First Name
Todd
Truck Year
1986
Truck Model
K20
Engine Size
454
@greenweenie
Yeah I experienced the same lifting but it was on fully cured over spray from the secondary color when I was spraying the primary color base coat on the blue truck. Luckily it was only 1 area on the tailgate. I had to do some quick scraping and sanding while base coating the largest portion of the truck and re spray.
The key is IMO to never lay on basecoat thick, especially if over a surface that is more susceptible to damage from reducer.
Never happened to me before in my shadetree experience.
 

Grit dog

Full Access Member
Joined
May 18, 2020
Posts
5,929
Reaction score
9,787
Location
Washington
First Name
Todd
Truck Year
1986
Truck Model
K20
Engine Size
454
@coolpup32
Another advantage of 2 stage. It’s much harder to screw up basecoat. And much easier to fix before clear, than a single stage.
And IMO clear coat is more forgiving to fixing stuff afterwards for a couple reasons. First the whole color sanding issue with metallic single stage.
But moreso as long as you get the basics right, prep and recoat time, no solvent pop, etc same stuff as single stage application, you can sand out the worst of runs and orange peel. And you can always sand and re-clear anything from a spot blend to another panel with zero effect on the color or minor differences from shooting at a different time.
I had an almost disaster when clear coating the largest portion of the truck.
I was doing it in the winter. Outside temp in the 40s and I ended up not being able to keep the shop up to temperature because I basically could never stop painting and close the shop up to reheat like I was doing for smaller portions previous. Plus I’d wet sanded the clear on the bed on the secondary color and was re-clearing that along with clear over the primary color.
Well the orange peel got pretty bad on most vertical surfaces and even not great on flat surfaces that I could pile on the clear. And the clear on both bed sides slid or sagged in a delayed manner like a melting ice cream cone after the second coat. I gave it some extra time and piled on 2 more heavy coats.
But was able to save it with early and aggressive sanding knowing I had a ton of clear on it.
That would not have been pretty or maybe even saveable with single stage.
 

coolpup32

Member
Joined
Jan 15, 2022
Posts
35
Reaction score
4
Location
MS
First Name
Jeff
Truck Year
1976
Truck Model
k10
Engine Size
350
@coolpup32
Another advantage of 2 stage. It’s much harder to screw up basecoat. And much easier to fix before clear, than a single stage.
Yea, this sums up what i've learned so far. basecoat seems more forgiving. I think my prep will be ok but i'm always worried. Its factory paint except the new panels. I plan to 80grit sand moderately, exposing primer but not metal and spray HB primer. I thought i was closer to this step but realized i needed to replace the front lower corner, its paper thin
 

R Carnella

Supporting Member
Supporting Member
Joined
Sep 21, 2017
Posts
359
Reaction score
753
Location
Long island
First Name
Rich
Truck Year
1990
Truck Model
Suburban V2500
Engine Size
5.3
I used Eastwood epoxy and primer and tamco paint (that bitch orange/murdered out black) came out great.
Pre pan price was around $1,100 for 1gal of orange,2gal of black and two gal of clear. I would imagine prices have gone up but i highly recommend Tamco paint
You must be registered for see images attach
 
Top