Suburban Convertible

Disclaimer: Links on this page pointing to Amazon, eBay and other sites may include affiliate code. If you click them and make a purchase, we may earn a small commission.

smoothandlow84

I'd rather be draggin' frame
Joined
Jan 4, 2015
Posts
2,121
Reaction score
784
Location
Arizona
First Name
Steve
Truck Year
1984 Frame...87 motor and 700r trans
Truck Model
1500 r10 pavement scraper
Engine Size
350 TBI
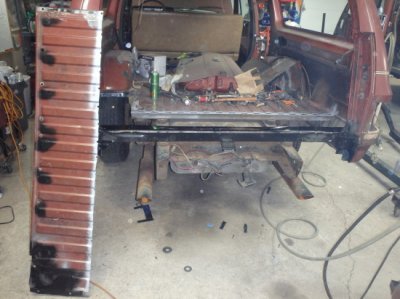
Hey S&L, I appreciate your input, suggestions and good words. However this is a 2wd street machine. It will never be off-roaded or raced. Just a beach/car show cruiser, tow vehicle.

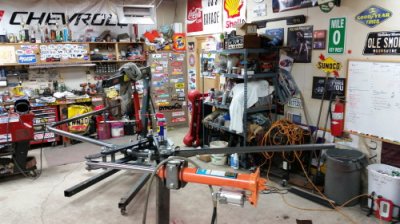
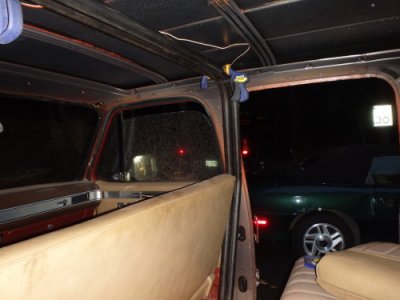
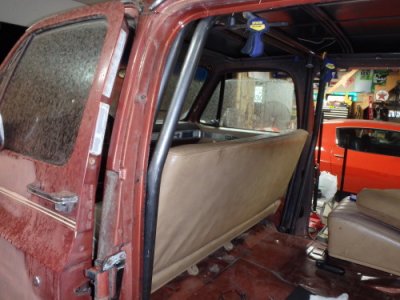
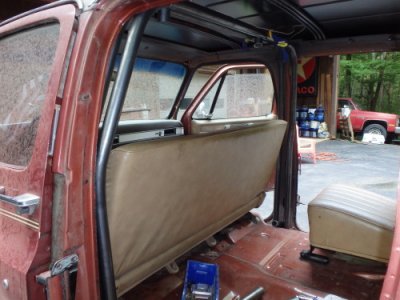
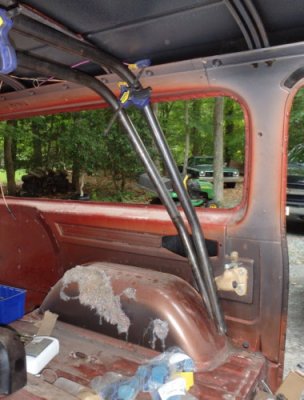
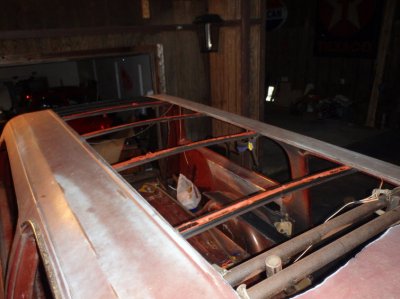
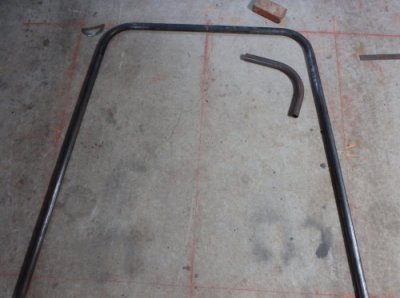
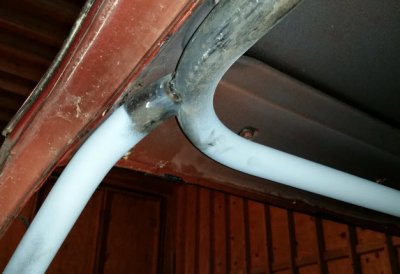
I've been thru all the boards and read tons on the subject, DOM vs Sch, and to be honest I was going to build it with DOM. But went cheaper at the last minute because the bars are there for 3 simple reasons:

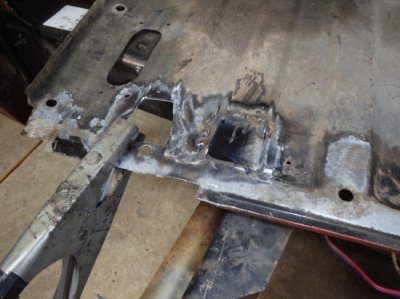
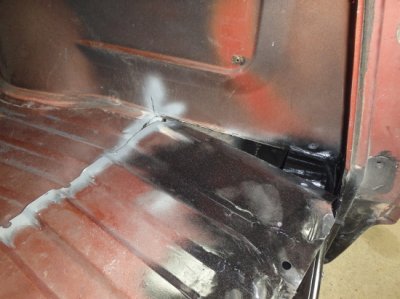
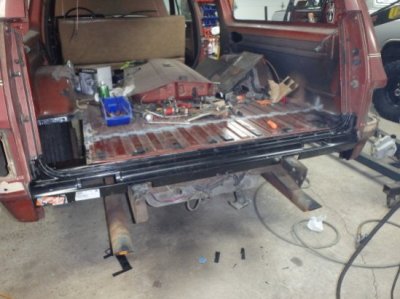
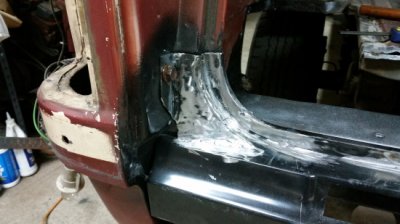
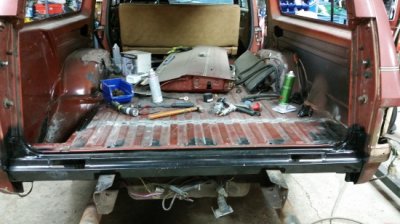
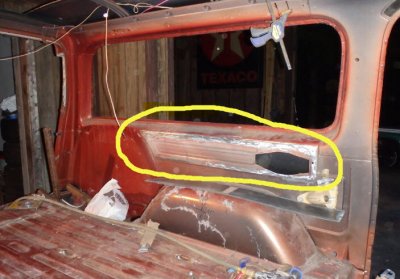
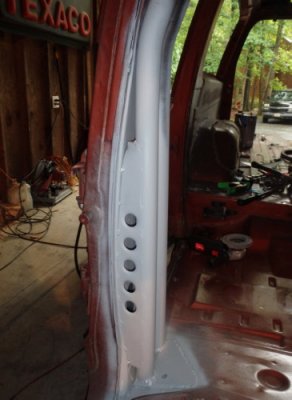
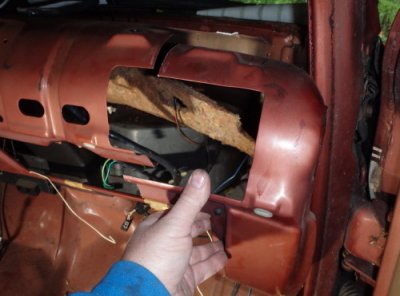
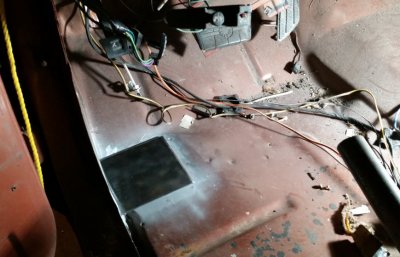
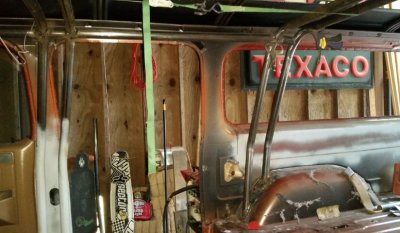
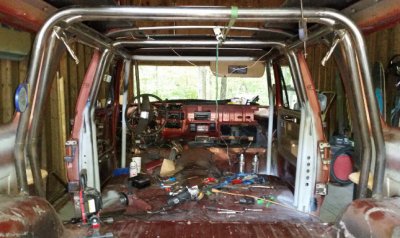
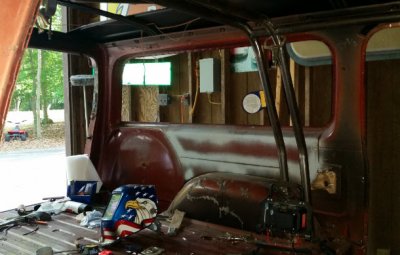
1- tie the box back together and prevent the pillars from flexing around. I am positive that these bars will be many times stronger than the original roof, so thats good enough for me,
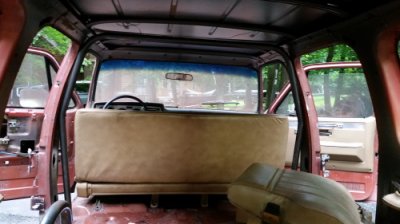
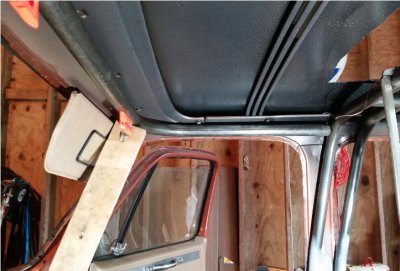
2- give it a cool look, hopefully and
3- be able to tie a rain bimini to it for unexpected wet conditions.

The boys each have their own projects, but I've enjoyed working with them on this. I think they have too. I know they'll love driving it when we finish.


Glad to hear you understand my logic and thanks for taking it as a concern and not trying to "preach". Certainly looks like it will be a fun project. Keep up the pics.
 

bucket

Super Moderator
Staff member
Super Moderator
Joined
Aug 3, 2010
Posts
29,108
Reaction score
23,981
Location
Usually not in Ohio
First Name
Andy
Truck Year
'77, '78, '79, '84, '88
Truck Model
K5 thru K30
Engine Size
350-454
Hey Bucket, I believe your life would be much easier if you use the method I did. You would have to cut a hole pretty high up the body line to be able to slide that member in from the left. It would have to be up just below the tail light opening height because you'd need to slide it in horizontally and up under the "shelf" of the inner panel on the right side. There is NO wiggle room. PLUS, I am confident that your corners are sagging (like mine were) if your member is rusted out now. Its not properly supporting the corners. I had to jack up both corners at the same time so the bolts would line up.

Cutting and re-welding the floor is no big deal and who cares if the body work there is so-so. I plan on painting the interior with bed liner, so you'll never see the seam on mine.


Actually, my rear corners aren't sagging yet. The tailgate is still mounted solid too, it's just that there's getting to be some crusty/flaky areas and I know things will start to turn ugly in a hurry. Like my quarter panels, haha. I know what you are talking about though, I had a barn door Burb that the rear corners sagged so bad the doors didn't clear the rear bumper. I jacked up the body and supported it with square box tubing and heavy steel plate.

You pretty much have me convinced to try your method though. That means I can also go ahead and fix the rear quarters before messing with the tailgate.
 

SpeeedRacer62

Full Access Member
Joined
Mar 7, 2015
Posts
72
Reaction score
68
Location
Fredericksburg, VA
First Name
Chris
Truck Year
1986
Truck Model
Suburban C20
Engine Size
454
Was able to get a few things done on this tail panel the other night. Had to cut out a few rusted spots on the floor pan and install some patches. The right side of the floor pan had to hook into the spot weld area on the support cross member then rotated into position. Once there, I tacked the panel along the line where I cut it out. Next I started fitting the rear tail member "cover". This came welded to the member but I had to remove it because it theres no way to install the piece as 1. As you can see I need to do some massaging to get it to fit properly. I've also decided to keep my spare tire well so it will be going in next.
 

Attachments

  • P6236230a.jpg
    P6236230a.jpg
    91.3 KB · Views: 182
  • P6236238a.jpg
    P6236238a.jpg
    93.7 KB · Views: 158
  • P6236243a.jpg
    P6236243a.jpg
    88.5 KB · Views: 198
  • P6236247a.jpg
    P6236247a.jpg
    49.4 KB · Views: 187
  • P6236249a.jpg
    P6236249a.jpg
    82.5 KB · Views: 156

SpeeedRacer62

Full Access Member
Joined
Mar 7, 2015
Posts
72
Reaction score
68
Location
Fredericksburg, VA
First Name
Chris
Truck Year
1986
Truck Model
Suburban C20
Engine Size
454
Got a lil more work done on the truck the other day. The "gravel pan/rear valance/tail panel", whatever you want to call it was formed sooo poorly overseas (Goodmark part) that I had to cut off both upright sections and totally reshape them from scratch. Not only did they not line up with the door jamb weatherstrip area, but the bends were so bad and mis-shaped that the entire piece stood off the rear support beam by a full inch! Its meant to sit flush and weld to it, then the floor pan edge sits over it. Hours of massaging later I got it to fit. Then I welded in my cut floor pan section and set my spare tire well.

Finally got my die from JD2, so I'm laying out tube to get the right contour and fit. I planned on installing the roll bars first with the roof in place to keep the alignment correct. But I'm finding out it sure would be easier with the top off.
 

Attachments

  • 20150627_103718a.jpg
    20150627_103718a.jpg
    74.2 KB · Views: 161
  • 20150627_113651a.jpg
    20150627_113651a.jpg
    81.5 KB · Views: 161
  • 20150627_124115a.jpg
    20150627_124115a.jpg
    69 KB · Views: 196
  • 20150627_150921a.jpg
    20150627_150921a.jpg
    67.4 KB · Views: 184
  • 20150627_175505a.jpg
    20150627_175505a.jpg
    79.9 KB · Views: 186

smoothandlow84

I'd rather be draggin' frame
Joined
Jan 4, 2015
Posts
2,121
Reaction score
784
Location
Arizona
First Name
Steve
Truck Year
1984 Frame...87 motor and 700r trans
Truck Model
1500 r10 pavement scraper
Engine Size
350 TBI
Nice progress. It sucks that the aftermarket panels are made so poorly. I was fortunate enough on my build that there were an ample amount of donor squares in the local scrap yards to choose from and rust is rare here in the desert. Keep up the great work.
 

SpeeedRacer62

Full Access Member
Joined
Mar 7, 2015
Posts
72
Reaction score
68
Location
Fredericksburg, VA
First Name
Chris
Truck Year
1986
Truck Model
Suburban C20
Engine Size
454
Yesterday I got intimate with my JD2 M32 tube bender. Been dying to bend some tube for the pillar supports. After a few hours of measuring, laying out patterns and bending at the wrong spots I think I have it under control. I only got the "easy" set done, for the B pillar. Here are a few shot of me playing with the spacing between the 2 hoops. I plan on making 2 for each pillar and tying them together with notched tube pieces and gussets.
 

Attachments

  • 20150703_173125a.jpg
    20150703_173125a.jpg
    89.7 KB · Views: 174
  • 20150703_173141a.jpg
    20150703_173141a.jpg
    59.9 KB · Views: 187
  • P7036267a.jpg
    P7036267a.jpg
    64.7 KB · Views: 195
  • P7036271a.jpg
    P7036271a.jpg
    85.7 KB · Views: 165

SpeeedRacer62

Full Access Member
Joined
Mar 7, 2015
Posts
72
Reaction score
68
Location
Fredericksburg, VA
First Name
Chris
Truck Year
1986
Truck Model
Suburban C20
Engine Size
454
Spent some time adjusting and rebending the loops at the B pillar. Also made some loops for the C pillar. Can't quite mount them behind the door opening due to the second row seat latches. I'll weld these to the front of the wheel well with a base plate.
 

Attachments

  • P7056272a.jpg
    P7056272a.jpg
    84.8 KB · Views: 149
  • P7056274a.jpg
    P7056274a.jpg
    82 KB · Views: 145
  • P7056276 - Copyab.jpg
    P7056276 - Copyab.jpg
    75.7 KB · Views: 183

SpeeedRacer62

Full Access Member
Joined
Mar 7, 2015
Posts
72
Reaction score
68
Location
Fredericksburg, VA
First Name
Chris
Truck Year
1986
Truck Model
Suburban C20
Engine Size
454
Happy Holidays everyone! Not much progress on my convertible due to job issues and other life events. I hope to get back on track during December.
 

SpeeedRacer62

Full Access Member
Joined
Mar 7, 2015
Posts
72
Reaction score
68
Location
Fredericksburg, VA
First Name
Chris
Truck Year
1986
Truck Model
Suburban C20
Engine Size
454
FINALLY got some "me" time to work on my convertible project. This week I pulled it out of the moth balls and cleaned out all the crap to make room to work. First I cut out the middle top of the roof so that I could recycle that sheet metal. I used part of it to cover up the rear side panel where it was recessed and used to have the rear speakers. Welded that in and grinded it down. Next I cut some 1/8" plates and welded them to the floors at the B pillar. I plan on welding my 2 main B hoops to these plates and then tie the other hoops to this. I've fitted the C pillar hoops as well. Tomorrow I'll be welding the B hoops to the floor and making small 2" connectors to tie the double hoops together.
 

Attachments

  • sub1.jpg
    sub1.jpg
    81.4 KB · Views: 148
  • sub2a.jpg
    sub2a.jpg
    87.4 KB · Views: 158
  • sub3a.jpg
    sub3a.jpg
    95.7 KB · Views: 168
  • sub4b.jpg
    sub4b.jpg
    97 KB · Views: 153
  • sub5b.jpg
    sub5b.jpg
    83.8 KB · Views: 168

SpeeedRacer62

Full Access Member
Joined
Mar 7, 2015
Posts
72
Reaction score
68
Location
Fredericksburg, VA
First Name
Chris
Truck Year
1986
Truck Model
Suburban C20
Engine Size
454
Late last week I welded in the 2 hoops for the B pillar. Then I made some gussets from the roof sheet metal, installed some trick dimples and tied the B pillar to both hoops. Also made some shorty connectors that will tie both hoops together at the top.
 

Attachments

  • b1a.jpg
    b1a.jpg
    69.9 KB · Views: 169
  • b4a.jpg
    b4a.jpg
    62.1 KB · Views: 168
  • b2b.jpg
    b2b.jpg
    75.9 KB · Views: 164
  • b3a.jpg
    b3a.jpg
    57.9 KB · Views: 165

SpeeedRacer62

Full Access Member
Joined
Mar 7, 2015
Posts
72
Reaction score
68
Location
Fredericksburg, VA
First Name
Chris
Truck Year
1986
Truck Model
Suburban C20
Engine Size
454
Over the weekend I started working on the A pillar hoop. I removed the windshield, dash pad and some speakers to mock up how I could install a hoop on the A pillar. I decided it would be easier to cut the corners out of the steel dash frame, allowing me ample room to fit a full hoop. As you can see from the pics, I need to modify the EBrake pedal. Next I started making the hoop.
 

Attachments

  • d1a.jpg
    d1a.jpg
    74.5 KB · Views: 159
  • d2a.jpg
    d2a.jpg
    76.2 KB · Views: 162
  • d3a.jpg
    d3a.jpg
    79.9 KB · Views: 179
  • d4a.jpg
    d4a.jpg
    62 KB · Views: 156
  • d5a.jpg
    d5a.jpg
    52.7 KB · Views: 151

SpeeedRacer62

Full Access Member
Joined
Mar 7, 2015
Posts
72
Reaction score
68
Location
Fredericksburg, VA
First Name
Chris
Truck Year
1986
Truck Model
Suburban C20
Engine Size
454
After messing up lots of tubing, I decided to tackle the A pillar differently. I wanted to make a hoop from the floor, up behind the dash, angled with the pillars and along the top of the windshield. I just couldn't figure out the proper bends. So I decided to make a "halo" loop and then 2 relatively easy uprights to make the front of this cage. It took a few bends to get them where I wanted. So now the front A pillar bars are deep into the dash and mount to the floor using 6x6" x 1/8th plate. You can see the spot welds of the floor pan to the cab mount underneath. I fully welded the plate to the floor, then the upright to the plate. I'll come back and make some gussets to attach the uprights to the A pillars right behind the windshield.
 

Attachments

  • a pillar 4.jpg
    a pillar 4.jpg
    85.8 KB · Views: 150
  • a pillar 5.jpg
    a pillar 5.jpg
    93.6 KB · Views: 152
  • a pillar 8.jpg
    a pillar 8.jpg
    86.5 KB · Views: 174
  • a pillar 9.jpg
    a pillar 9.jpg
    49 KB · Views: 142

Eighty5C10

Member
Joined
Jun 15, 2016
Posts
32
Reaction score
0
Location
Texas
First Name
Robert
Truck Year
1985
Truck Model
C10
Engine Size
350 4 bolt main
I'm definitely subscribing! I love the work!
 

SpeeedRacer62

Full Access Member
Joined
Mar 7, 2015
Posts
72
Reaction score
68
Location
Fredericksburg, VA
First Name
Chris
Truck Year
1986
Truck Model
Suburban C20
Engine Size
454
This weekend I got some time to work on the old wagon. I had formed up some hoops for the C pillar months ago but wanted to put A and B hoops in place first and work towards the rear. I fabricated some 1/8" plates onto the front of the rear wheel wells. I had to place the hoops on the wheel wells because I wanted to keep the folding rear seat. Its held in place by 2 mechanisms that bolt to the inner wall right behind the rear door openings.

Using a angle finder I was able to mock up where they'd mount. I cut, recut and ground down the hoop "feet" many times to match the contour of the wheel wells. Once I was happy with the fit I measured distance between the B pillar hoop and the new C hoop and cut 2 short and 2 long connectors and notched them. Using some clamps and a ratcheting strap to hold everything in place I welded the hoops to the plates.
 

Attachments

  • c pillar1.jpg
    c pillar1.jpg
    92.4 KB · Views: 119
  • c pillar2.jpg
    c pillar2.jpg
    85.2 KB · Views: 132
  • c pillar3.jpg
    c pillar3.jpg
    60.5 KB · Views: 136
  • c pillar4.jpg
    c pillar4.jpg
    58.6 KB · Views: 154

Latest posts

Forum statistics

Threads
42,137
Posts
909,886
Members
33,633
Latest member
satansdad
Top