Roof Sheet Metal

Disclaimer: Links on this page pointing to Amazon, eBay and other sites may include affiliate code. If you click them and make a purchase, we may earn a small commission.

Radiohead

Reducing tire diameter 1000 revolutions at once
Joined
Mar 17, 2022
Posts
1,774
Reaction score
5,795
Location
Low Earth Orbit
First Name
Eric
Truck Year
MCMLXXIX
Truck Model
C-20 Silverado Camper Special
Engine Size
454 crazy cubes, or 7.4 luscious litres
I'm following this one because after I got mine home is when I discovered butt prints, deep ones, on both sides right behind the windshield. I was so happy with what I saw from below, rust wise, I didn't even tippy toe to look up until long after those tweakers blew those Benjamins through their pipe.
 

DanMcG

Full Access Member
Joined
Jun 28, 2014
Posts
1,076
Reaction score
1,881
Location
Central NY
First Name
Dan
Truck Year
1978 1985
Truck Model
k10 k10
Engine Size
400 350
This sheet metal is so thin, doubt it would take much.
The sheetmetal is probably 19 gauge like the rest of the truck, but once it's stretched and oil canning it will seem like a tin can (no oil cans around anymore)
I know you're in a hurry but this fix will take time and some patience.
Any chance you're willing to drill 3"-4" hole(s) in the inner roof panel to get a dolley in there?
 

Doppleganger

Full Access Member
Joined
May 24, 2019
Posts
11,599
Reaction score
53,641
Location
OH-MI: Just like it sounds
First Name
Chris
Truck Year
1985
Truck Model
K20
Engine Size
5.7
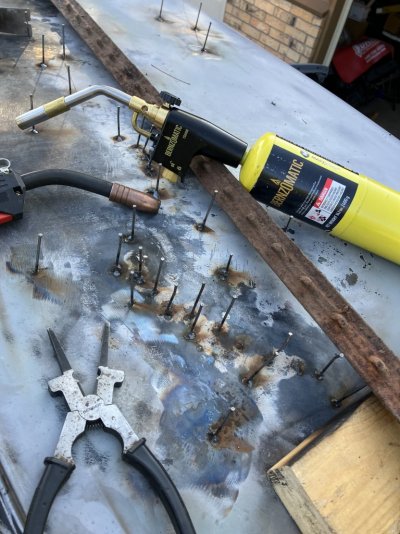
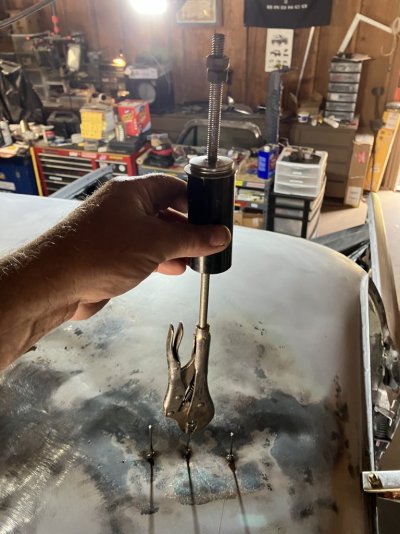
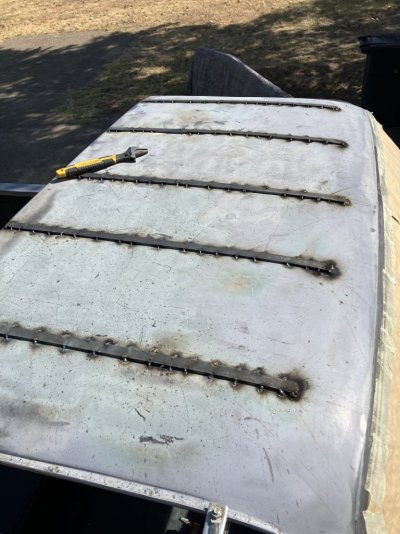
WELL.....(deep subject)...so I got the stud welder out - no studs, just that hot tip. It actually comes with a rounded tip just for this. I located 3 epicenters of the oil canning - all about equal distance from left to right. FWIW, I'm about 80% certain now this was caused by the wind in the interior light hole, so note to self: ever do this again, a piece of duct tape is your friend.

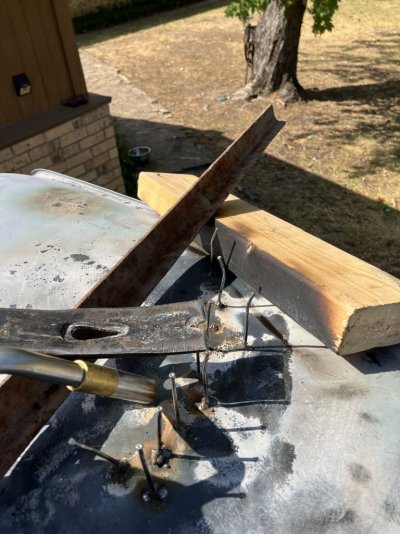
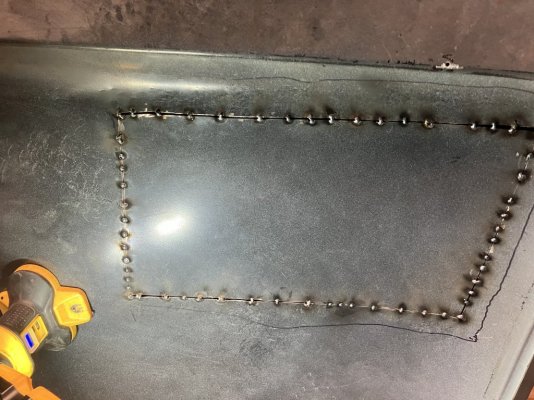
I started on the far right (pass) side. Ground off a 12"x18" area of paint where the flexing was. Wiped it down and got a dry cloth and then a cold wet cloth ready. The rounded edge on the side (6" in) was still rock solid. I started heating a tacked area - maybe 3-4 at a time and spread out. Waited 2-3 sec and stuck the cold wet rag on it. You could see the tacked area drawn down afterwards. Maybe 50-75 or so later, the area was rock solid. Maybe better than before. Its ever-so-slightly flatter (I think), which will work well with a thin layer of filler.

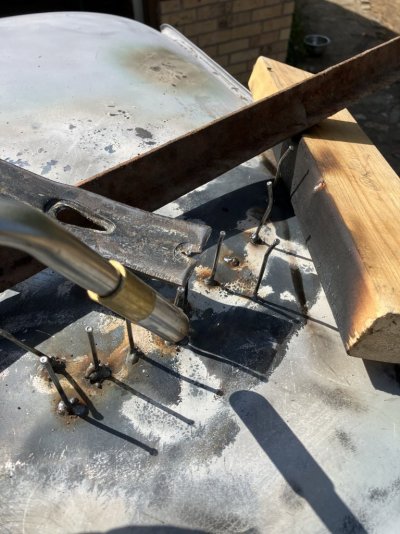
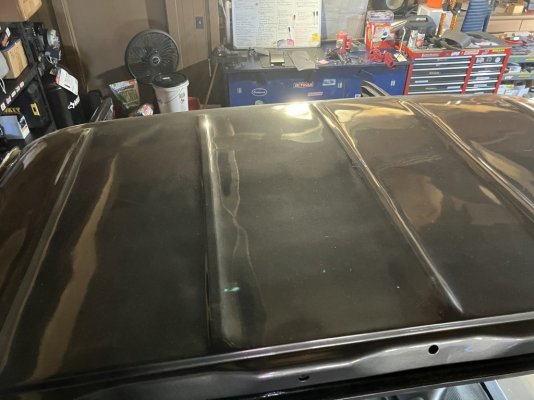
Moved to the middle area and continued on. This was the worst as it was the (IMO) the source of the whole issue. It was like a water bed. I continued on a few tacks at a time...about 50-75, the whole area was really firming up. Whats more is, the far left side was also firming up and I never touched it. There is still some 'softness' around where the cab lights are going, but that area is contoured and holds its shape just fine.

I spent about 1.5 - 2 hrs on it. Its getting ready to rain so I'll mess with it another day, but UFB.....I would have never believed this had I not seen it. I like my stud welder a whole lot more now too. :hat:

So thanks everyone - you fellas are tops - I owe you a beer.
:cheers:
 
Last edited:

Doppleganger

Full Access Member
Joined
May 24, 2019
Posts
11,599
Reaction score
53,641
Location
OH-MI: Just like it sounds
First Name
Chris
Truck Year
1985
Truck Model
K20
Engine Size
5.7
Kind of hard to get a pic inside the garage but this is what it currently looks like. Fugly but much better. The dark spots are just heat discoloration and comes off with zero effort and a 400 grit sponge. Once its all done, I'll sand the whole thing clean and get some zinc phosphate on it til I can get it covered in something more permanent. Hoping the weather comes back. Cant believe how thin the paint and primer both was.

You must be registered for see images attach
 

Doppleganger

Full Access Member
Joined
May 24, 2019
Posts
11,599
Reaction score
53,641
Location
OH-MI: Just like it sounds
First Name
Chris
Truck Year
1985
Truck Model
K20
Engine Size
5.7
@Doppleganger seems like you run into the damnedest things and threaten to junk or sell the whole thing, but in the end you get things worked out. I admire your perseverance and good fortune. Keep it up!!!!!!!
I admit that I vent...alot. Wife and I have had "the talk" about this truck though.....too much $ has gone into it thats its not fun anymore. We want to move - soon - and cant til its done. Its these constant (stupid) setbacks that trigger it. If I had $ or at least a place to work on it, it'd be different.

AND.....little man gets cranky without his coffee....or beer (depending the time of day). Therapy comes in all forms.....and proofs. LMAO
 

Grit dog

Full Access Member
Joined
May 18, 2020
Posts
5,882
Reaction score
9,622
Location
Washington
First Name
Todd
Truck Year
1986
Truck Model
K20
Engine Size
454
I cant see how the original shape could ever be recovered. Unless I win a lottery and could have someone who knows what they're doing fix this, this is about the end of the whole mess for me.

Thanks fellas.
**** dude. It’s a K20. Best way to hide that is spend the time and money you’d spend on the roof on a lift kit and some big tires. Then even Shaq won’t see it!
Or in other words. You’re not taking it to Pebble Beach. Sand it down slap some paint on it and let er rip!
And be glad it’s not on the hood. I spent a lot of hours on one of them on the hood, lol.
 

Doppleganger

Full Access Member
Joined
May 24, 2019
Posts
11,599
Reaction score
53,641
Location
OH-MI: Just like it sounds
First Name
Chris
Truck Year
1985
Truck Model
K20
Engine Size
5.7
Not to be a smartarse.....but 2 cars I restored actually ended up at Pebble Beach.

So you never know...... :hat:
 

DanMcG

Full Access Member
Joined
Jun 28, 2014
Posts
1,076
Reaction score
1,881
Location
Central NY
First Name
Dan
Truck Year
1978 1985
Truck Model
k10 k10
Engine Size
400 350
well you sure made that look simple, Nice work!
 

BlazerBill

Full Access Member
Joined
Mar 24, 2023
Posts
73
Reaction score
60
Location
Texas
First Name
Billy
Truck Year
1983
Truck Model
Chevy K5 Blazer
Engine Size
350
Okay, I’ve read the comments, and the Pro Shaper is too expensive and may not get the creased dents and all the oil canning out. I tried a stud welder which wasn’t effective enough and have now resorted to a homemade slide hammer that doesn’t get the sharp creased dents out, so I welded on nails to pull the metal up with a carpentry pry bar while I’m heating the metal with a map torch which gets the metal plenty hot and supporting my pry bar with a fence post I use to bridge across the roof with 2x4’s sitting on the drip rails. This sucks BAD, is awkward and painful, literally, but the roof is better than it was using this method. Won’t be perfect by any means. Go ahead and laugh and call me a backyard ******* mechanic. I’ll probably give up soon and call it good enough.
 

Attachments

  • IMG_8030.jpeg
    IMG_8030.jpeg
    181.4 KB · Views: 37
  • IMG_8022.jpeg
    IMG_8022.jpeg
    169.1 KB · Views: 40
  • IMG_8018.jpeg
    IMG_8018.jpeg
    138.5 KB · Views: 41
  • IMG_8020.jpeg
    IMG_8020.jpeg
    173 KB · Views: 32

BlazerBill

Full Access Member
Joined
Mar 24, 2023
Posts
73
Reaction score
60
Location
Texas
First Name
Billy
Truck Year
1983
Truck Model
Chevy K5 Blazer
Engine Size
350
Follow up to my previous reply. After using the crude technique I described in my previous reply and pics, I also had to cut an access panel into the interior roof skin which allowed me to bang out the remaining dents in the outer roof skin and spray Eastwood chassis paint with the provided long tube into the cavity between the outer and inner skins. I then re-welded the inner roof panel back up and finished the bodywork around the roof stiffeners I welded on and painted. Lots of work, not perfect but didn’t turn out too bad.
 

Attachments

  • IMG_8078.jpeg
    IMG_8078.jpeg
    168.5 KB · Views: 14
  • IMG_8087.jpeg
    IMG_8087.jpeg
    209.6 KB · Views: 16
  • IMG_8794.jpeg
    IMG_8794.jpeg
    250 KB · Views: 14
  • IMG_8793.jpeg
    IMG_8793.jpeg
    127.9 KB · Views: 14

HotWheelsBurban

Full Access Member
Joined
Mar 31, 2023
Posts
1,663
Reaction score
3,571
Location
Houston, Texas
First Name
Carol
Truck Year
1990
Truck Model
R2500 Suburban
Engine Size
350
Follow up to my previous reply. After using the crude technique I described in my previous reply and pics, I also had to cut an access panel into the interior roof skin which allowed me to bang out the remaining dents in the outer roof skin and spray Eastwood chassis paint with the provided long tube into the cavity between the outer and inner skins. I then re-welded the inner roof panel back up and finished the bodywork around the roof stiffeners I welded on and painted. Lots of work, not perfect but didn’t turn out too bad.
Looks like a crew cab top now LoL. All kidding aside, it came out really good!
 

Latest posts

Forum statistics

Threads
41,848
Posts
903,426
Members
33,362
Latest member
Dhatch84
Top