Mr Stay Puft
Member
- Joined
- Jan 6, 2022
- Posts
- 45
- Reaction score
- 72
- Location
- California
- First Name
- John
- Truck Year
- 1989
- Truck Model
- V1500 Suburban
- Engine Size
- 350 TBI
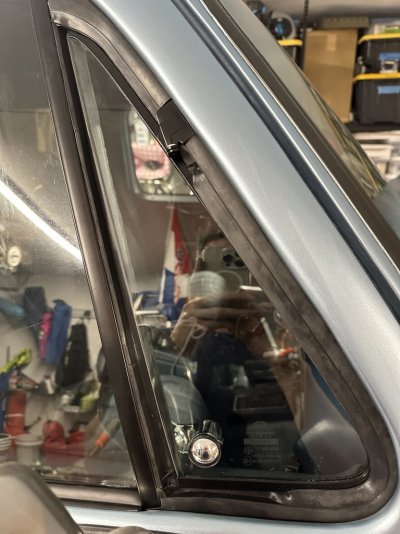
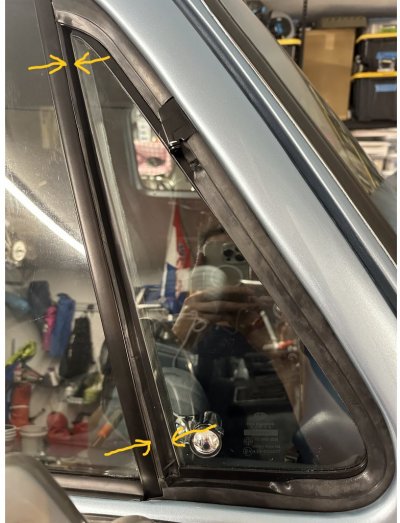
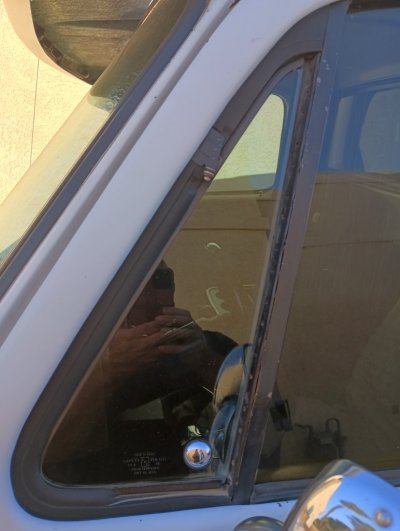
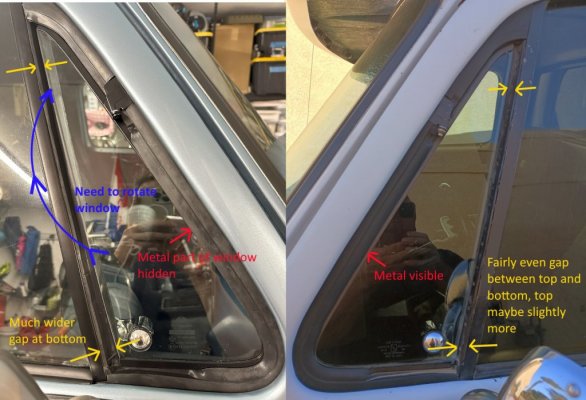
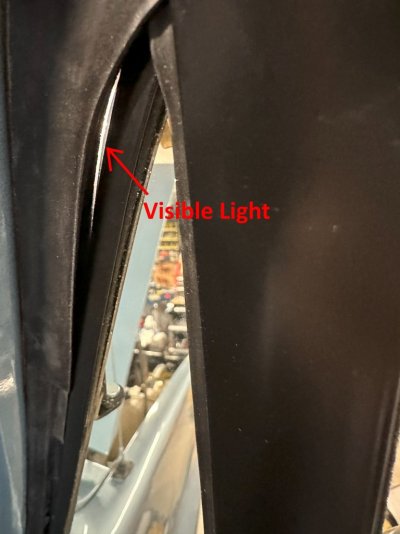
I just got my vent windows back from Precision who did a full rebuild on both. I was hoping it was going to fix the wind noise I was having around them, but it seems actually worse. I’ve attached a video and some pictures. The seal at the top is not adequate. I’m getting a ton of noise through it. I know, blare the stereo…. Is there an adjustment I am missing? It almost looks like the entire window needs to be rotated clockwise. I am not getting enough of a seal at the top and it looks like the bottom has a ton. Also if you look at the back edge of the glass it isn’t parallel to the metal dividing support between the main window and vent window.
xc_hide_links_from_guests_guests_error_hide_media