87scotty
Full Access Member
- Joined
- Oct 8, 2015
- Posts
- 1,114
- Reaction score
- 435
- Location
- Central il
- First Name
- Andrew
- Truck Year
- 1987
- Truck Model
- V20
- Engine Size
- 5.7 for now
Haha nice


Disclaimer: Links on this page pointing to Amazon, eBay and other sites may include affiliate code. If you click them and make a purchase, we may earn a small commission.
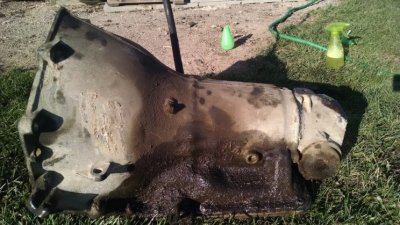
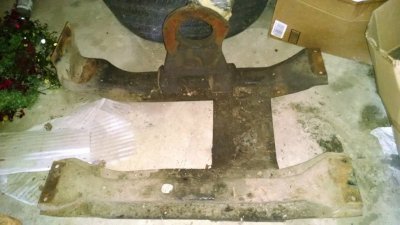
 ). I was happy to see a big "K" on the top of the housing! Got it down in the basement tonight after powerwashing it quickly to clean it off some. Now time to start tearing it down, taking pics and giving them to my brother to get hot tanked.
Ok got the tranny out friday night (around 4am...
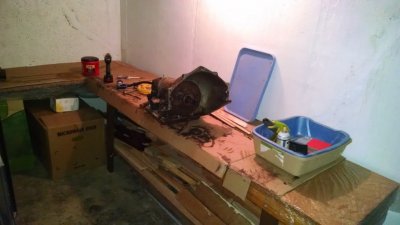
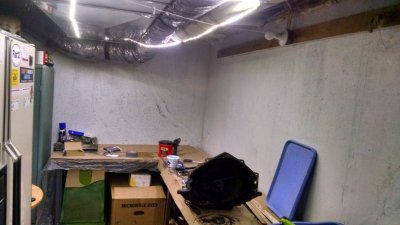
It looks like your overly prepared and going to lose your organization steam before you need it, as far as the bench goes. The beer fridge is good, just remember a beer fridge that close to a transmission building area can go very wrong, very quickly.
If it was my work area I would ditch the plastic over the wood bench and just get a roll of pigmat and cover the entire surface. I would take apart the the transmission on the left side and organize the parts in order on the right with the rebuild kit being all the way to the right, for some reason that always worked for me. As of now it looks like some kind of bed for a homeless person with a transmission sitting on it.
While im on the subject you will need a parts washer for everything. Harbor freight has a cheap ass little bench top unit that works great and its dirt cheap. Go to the hardware store and fill it with a couple jugs of mineral spirits (paint thinner will melt it). That way you can properly clean all the hard parts. You also need compressed air to blow everything off, check clutch packs etc.
") Don't worry about the beer fridge; this was just the only spot I had to work on it as I'm cleaning out our (very) small garage for the winter so the wife can park in it.
Don't worry about the beer fridge; this was just the only spot I had to work on it as I'm cleaning out our (very) small garage for the winter so the wife can park in it. 
This is who I used for rebuild parts, recommended to me by by HotRodPC...
http://www.transmissionpartsusa.com/GM_Rear_Wheel_Drive_Transmission_Parts_s/238.htm
I would imagine you could hot tank any parts as long as there is no plastic involved. I wish I had that much bench space when I did mine lol
 What all do you guys suggest I beef up while in there just so I don't have to possibly redo anything in the near future if the engine gets upgraded?
I'm not sure what you mean by that first sentence. It will all get rearranged. I just had a neighbor who happened to be available and came over to help bring the tranny downstairs into the basement so I just put it down there while I had help.
I'm actually gonna put it on the right and tear it down to the left; basically the opposite of the direction you mentioned. I'm left handed and it'll work/feel better for me. I laughed at your homeless person bed comment. It looks dirty but that's a piece of cardboard I had on the benches when they were in the garage and I was painting the POR-15 on the 14 bolt rearend so it's just some dried POR-15 you're seeing on the cardboard. I'm gonna go pick up some pigmat at lunch but I also wanted something over the bench (so I could just pull it off and throw away after I take the tranny apart).
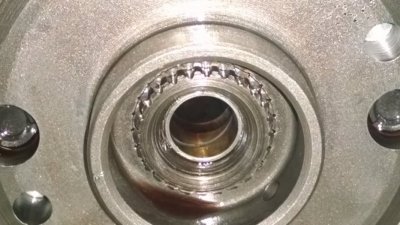
My brother (who's actually a mechanic by trade) has access to a hot tank at his work. I'm just gonna take him all the pieces after tear-down so he can wash them. Is it ok to hot tank all the internal parts? And finally, I've got a little portable air tank/compressor down there already to clean passages/test.
How's that for prepared?
My wife was due last Friday so I'm working on borrowed time right now and I'm sure it'll become a little slower build in the next couple of days when we have the next kid. fyi
And where do you guys get your rebuild kits, bushing kits and thrust washer kits from? Where's my cheapest option for quality parts?
Re-Edit: I dont see that p/n on their site anymore, might want to call them and make sure.