- Joined
- Sep 20, 2016
- Posts
- 2,130
- Reaction score
- 3,244
- Location
- Austria
- First Name
- Alexander
- Truck Year
- 1974, 1979
- Truck Model
- C20, K5
- Engine Size
- 350, 350
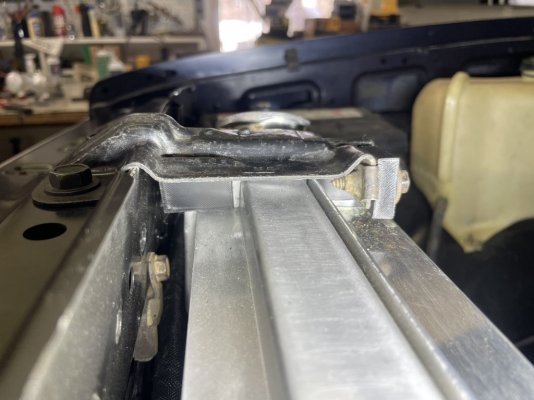
After several attempts to put my cold case direct fit radiator in my C20 with no avail I decided to make my own custom mounts.
The radiator measurement do not include the welds which add 2/3 inch and the way it's build doesn't allow the use of stock mounts.
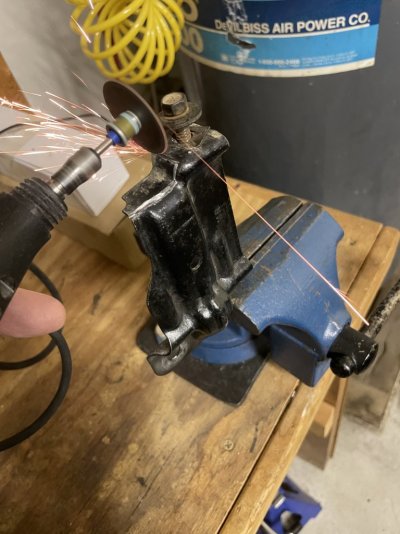
With measuring and some brain work I made a mold in a 3d software for my poly inserts. A friend printed them for me with a medium fine setting and pla filament.
I ordered 2k polyurethane for casting (medium hardness) and wax based release spray to seal the mold.
Cleaned the molds with silicone remover and applied a thin coat of spray.
Mixed the 2k material and tried avoid getting to much air bubbles in it. Slowly filled the molds with polyurethane.
I made only the lower ones black as the top ones are covered when all is done. The caramel tone is the color of the poly material
After 24 hours I took the bushings out and removed excess material.
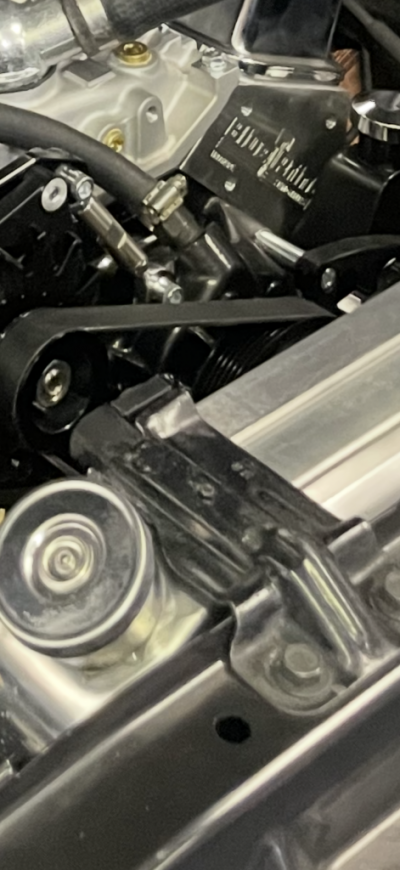
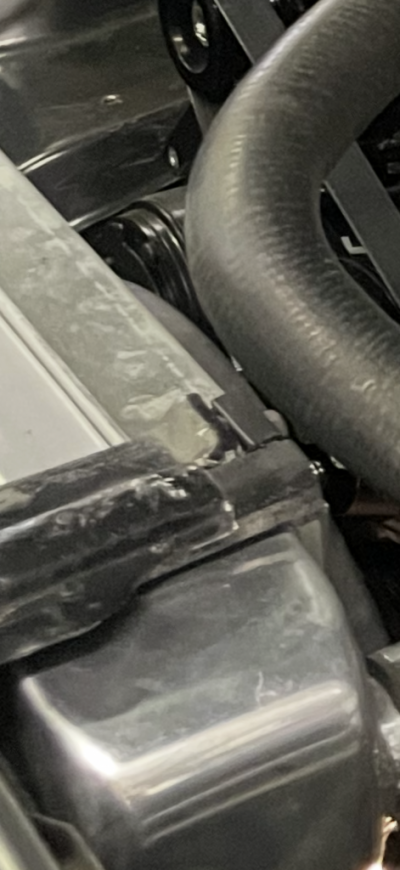
Made brackets and put the radiator in the truck.
Now it sits where it should and is not touching the radiator support.
Only thing missing is the upper mount which is next on my todo list.
The radiator measurement do not include the welds which add 2/3 inch and the way it's build doesn't allow the use of stock mounts.
With measuring and some brain work I made a mold in a 3d software for my poly inserts. A friend printed them for me with a medium fine setting and pla filament.
I ordered 2k polyurethane for casting (medium hardness) and wax based release spray to seal the mold.
Cleaned the molds with silicone remover and applied a thin coat of spray.
Mixed the 2k material and tried avoid getting to much air bubbles in it. Slowly filled the molds with polyurethane.
I made only the lower ones black as the top ones are covered when all is done. The caramel tone is the color of the poly material
After 24 hours I took the bushings out and removed excess material.
Made brackets and put the radiator in the truck.
Now it sits where it should and is not touching the radiator support.
Only thing missing is the upper mount which is next on my todo list.
You must be registered for see images attach
You must be registered for see images attach
You must be registered for see images attach
You must be registered for see images attach
You must be registered for see images attach