Need Wiring picture.

Disclaimer: Links on this page pointing to Amazon, eBay and other sites may include affiliate code. If you click them and make a purchase, we may earn a small commission.

mavtricks71

Full Access Member
Joined
Jun 29, 2016
Posts
222
Reaction score
60
Location
az
First Name
mike
Truck Year
1986
Truck Model
k10
Engine Size
350
So like a Dummy I didnt take pictures of the wiring on my 1986 k10 when i took the engine out. 350. The big loom harness that runs on the engine that comes off the firewall is it supposed to run behind the distributor or does it rest on the intake in front of the distributor? If anybody has this year truck still original can you post a picture how it was layed out probably be much better to see without air cleaner. Thank you Mike
 

mavtricks71

Full Access Member
Joined
Jun 29, 2016
Posts
222
Reaction score
60
Location
az
First Name
mike
Truck Year
1986
Truck Model
k10
Engine Size
350
Ricko thank you ..... was the loom bolted to back of the head to hold it in place?
 

RanchWelder

Full Access Member
Joined
Jan 14, 2023
Posts
632
Reaction score
916
Location
Earth
First Name
--------
Truck Year
87
Truck Model
Blazer
Engine Size
355ci
There is supposed to be plastic loops that stick into the firewall to hold your wiring around the back of the engine. LMC might sell them.

Does your wiring look like this mess?
You must be registered for see images attach


It's an 86', so it's not complicated. Make certain your distributor connectors are not broken and replace pigtails with quality connector tails from Standard Motor Products.
The seals must be in place especially to the distributor and the water temp sensor, or water will cook your ignition module.

The junction block on the firewall might need replacement, if it is corroded or the wires replaced to the battery if they seem warped or swolen with internal corrosion.
Take the time and rewire it properly, in case somebody hacked it before you bought it.
Buy a package of the round plastic tubing wire protection from HF or your local auto parts and take the time to make it right.

If you are not sure, ask for somebody local or find a forum member near you to assist.

Big Ray has the links for your diagrams. Ask him to respond to your post.

What you might want to end up with, is something like this:
You must be registered for see images attach
 

mavtricks71

Full Access Member
Joined
Jun 29, 2016
Posts
222
Reaction score
60
Location
az
First Name
mike
Truck Year
1986
Truck Model
k10
Engine Size
350
Wow that is a nice engine bay Ranch. The big 1 inch loom that runs out of the fuse panel Im pretty sure runs across the back of the engine behind the distributor and bolts to rear of the engine Head. It defintley wont go in the cable gutter cuz my oil sensor temp ect wont reach down that far. Being a K10 I think the transmission wires also bolt to rear of the head and run down to transfer case /tranny ect.
 

RanchWelder

Full Access Member
Joined
Jan 14, 2023
Posts
632
Reaction score
916
Location
Earth
First Name
--------
Truck Year
87
Truck Model
Blazer
Engine Size
355ci
It does not have to be factory spec to get good points for a clean resto-mod.

If your ground strap or loom mounts to the 3/8" short bolt to the back of the head, remove it once, bleed while doing so and NEVER EVER mount anything there again. (Unless you enjoy bleeding to get it out again and again).

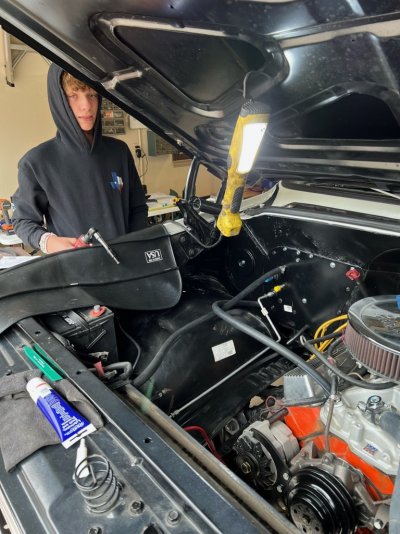
Extend those wires and clean the routing up. Buy some quality heat shrink able CRIMP connectors, buy the correct Ideal Crimper tool and re-rout everything like the C10 Cream Colored truck picture. Try to find a donor harness from a bone yard to keep the sensor wires the correct color codes, or invest in a Painless Harness and bite the bullet for a complete solution.

There are much better locations and sturdier distribution blocks for a safe electrical system. The 2 stud plastic junction block is a dud.

These trucks are meant to be worked on. Make it easy to work on in the future.
Do not tape it to death, a couple wraps every few inches keeps it clean and allows you to get back into the loom, when you need to. If you bury a crimp connection, your screwed.

GM originally mounted this stoopid stuff or wrapped wires through areas prone to exhaust heat exposure.

That cream truck is not my engine bay, however mine is on the forum for you to search for using my sig. It's not a show truck, because I use it for Mountain roads for fire wood and Hunting. My harness looks very similar, though, with substantial upgrades everywhere. My firewall has a 600 amp distribution block, from SkyCraft, in Orlando.

My threads related to electrical and fuel systems upgrades, tools and methods of protecting your systems via fly back, using relays, diodes, resistors and Zener diodes.

I recommend upgrading every ground and battery wire 2 sizes, if you can afford to do so. If your truck has a 10 gauge wire to the alternator, go 8 or 6. (I had 4 laying around).

Battery to starter: 2 gauge.
Fat battery wires rule when you eliminate the ability for corrosion to occur, because of sub standard wire gauge.

The "headlight relay mod", with properly fused relays, with fly back, oversized 12 gauge headlight harness, new connectors and piggies everywhere. Then bundle up your excellent crimps, using the tools I have recommended and wrap it for show or at least to keep the dirt out. Then the PowerMaster 150 or 200A alternator will run like a top and you can adjust for the AGM or Lithium battery upgrades, without improperly charging you modern battery selection.

Hit up my profile and search the electrical related posts, for my tech threads.
I list a lot of really good tools that are not very expensive and work.

Not every post will relate to your 86', but a lot of it will upgrade your electrical for reliability in a modern word. Build it slowly, as your budget allows.

You might save a few bucks on poorly performing tools and resolve some of your wiring issues, as you find them, upgrading everything.

The OEM electrical system for the 80's trucks is severely lacking.
The 16ga wires are all intentionally under rated for the expected service life 5 years max. They get corroded, kill all the electrical components, until your mechanic freaks you out with a service and repair bill equal to the cost of a new car payment.

The cool thing is, after you rewire everything the way you want it, you'll know every circuit like the back of your hand. Just buy quality connectors and use pigtails unless you have $150 for every Weatherpack and Delphi crimper rated for safe road use.

If you have the cash, or restoring your harness upsets you, go Painless Performance and get it over with. Just request they upgrade the wiring gauge for the entire harness, when you order. If you use the tools I recommend in my threads you can do this on a budget and succeed.

How old is your truck, with 5 year rated OEM wiring?
 
Last edited:

mavtricks71

Full Access Member
Joined
Jun 29, 2016
Posts
222
Reaction score
60
Location
az
First Name
mike
Truck Year
1986
Truck Model
k10
Engine Size
350
Ranch I appreciate the post unfortuntly with my health conditions Im going to have to just plug everything back in the way it was or at least close to it. I am at least covering the original loom with new loom for protection though.
 

Rick R

Supporting Member
Supporting Member
Joined
Dec 5, 2021
Posts
23
Reaction score
36
Location
Lockeford, Comiefornia
First Name
Rick
Truck Year
1973
Truck Model
c10/ Cheyenne Super
Engine Size
350
Great info. Thx.
Ranchwelder, on my 73 c10 original routing behind alternator, do I go in front (or above)or behind the fuel pump, then to starter. I’ve not been able to find that info.
 

Snoots

Full Access Member
Joined
Jan 23, 2013
Posts
8,191
Reaction score
16,052
Location
Georgia
First Name
Roger
Truck Year
1973
Truck Model
Jimmy Sierra
Engine Size
350
BTW, I got a pair of the correct connector crimpers for the WeatherPak pins from TEMU, about $8. They're good quality and do a perfect job!
 

84GMCSierra

Full Access Member
Joined
Feb 26, 2023
Posts
302
Reaction score
355
Location
Central Arizona
First Name
Paul
Truck Year
1984
Truck Model
C2500
Engine Size
350
There is supposed to be plastic loops that stick into the firewall to hold your wiring around the back of the engine. LMC might sell them.

Does your wiring look like this mess?
You must be registered for see images attach


It's an 86', so it's not complicated. Make certain your distributor connectors are not broken and replace pigtails with quality connector tails from Standard Motor Products.
The seals must be in place especially to the distributor and the water temp sensor, or water will cook your ignition module.

The junction block on the firewall might need replacement, if it is corroded or the wires replaced to the battery if they seem warped or swolen with internal corrosion.
Take the time and rewire it properly, in case somebody hacked it before you bought it.
Buy a package of the round plastic tubing wire protection from HF or your local auto parts and take the time to make it right.

If you are not sure, ask for somebody local or find a forum member near you to assist.

Big Ray has the links for your diagrams. Ask him to respond to your post.

What you might want to end up with, is something like this:
You must be registered for see images attach
That is one clean bay! Is it an AC truck? I'd like to do something like that to my 84 with AC
 

RanchWelder

Full Access Member
Joined
Jan 14, 2023
Posts
632
Reaction score
916
Location
Earth
First Name
--------
Truck Year
87
Truck Model
Blazer
Engine Size
355ci
Great info. Thx.
Ranchwelder, on my 73 c10 original routing behind alternator, do I go in front (or above)or behind the fuel pump, then to starter. I’ve not been able to find that info.

Search my sig for all the photo's of tools and pictures of the electrical work I use for examples.
Spend the time to wire it clean.

Try the newer braided wire loom systems from Amazon, which split long ways and wrap up around the wires and make it easy to open the loom whenever you want to mod something. You cut it then heat the strands up with a lighter or your soldering iron shaft. The old plastic ribbed stuff (which I used) is really outdated.

If you post pictures of the 73', somebody with your year truck will likely chime in with the detailed explanation you want for routing for show, or start another thread.

The aftermarket A/C company's offer the system with a block off plate for the upgrade heater / A/C Core in the pictures.
Figured the guys in the heat belt would catch that in the picture. It sure looks clean, when it all comes together, right?

My truck looks similar, except I have no A/C.
Fabricated my own block off plate and boxed my own custom aluminum blower housing under the dash.
All the OEM plastic dash ventilation and hoses are gone, (except the long part which ducts to the windshield).
Scrapped a Grocery store Fridge for large sheets of clean aluminum and used a bench vice to brake the metal by hand with rivets.
The OEM heater core is still in the custom box too.
 
Last edited:

Forum statistics

Threads
42,140
Posts
910,042
Members
33,642
Latest member
Bhardiman1
Top